The Classic French Jacket – Days 5 to 7

So far I have discussed my preparation and the first 4 days of the class, now to continue.

Next up were the sleeves, as I used Susan’s pattern I already had the 3 piece sleeve and Susan pins one of the toile sleeve to my jacket which got a nod of approval so I could cut out my sleeves in fabric, quilt the lining, and finished the sleeve placket.

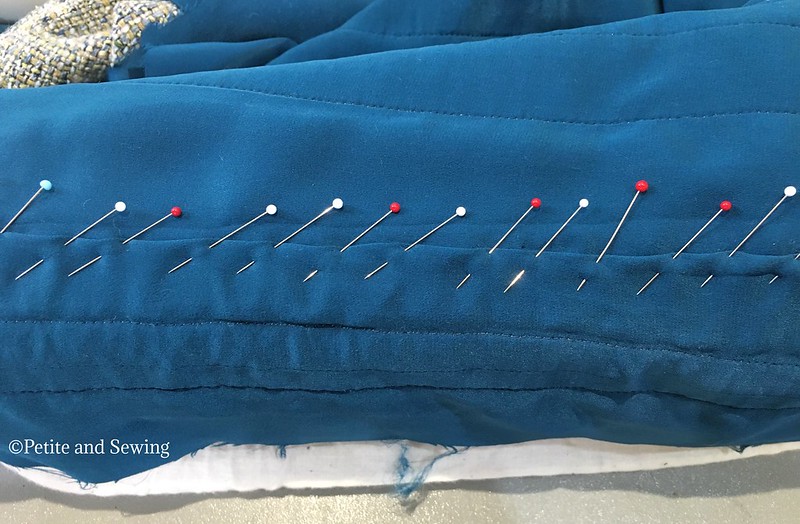
I then basted the under am sleeve seam together for a final check by Susan.  This is where there was a huge difference between the calico and the final fabric as Susan took out 1cm to 2cm off the underarm seam.

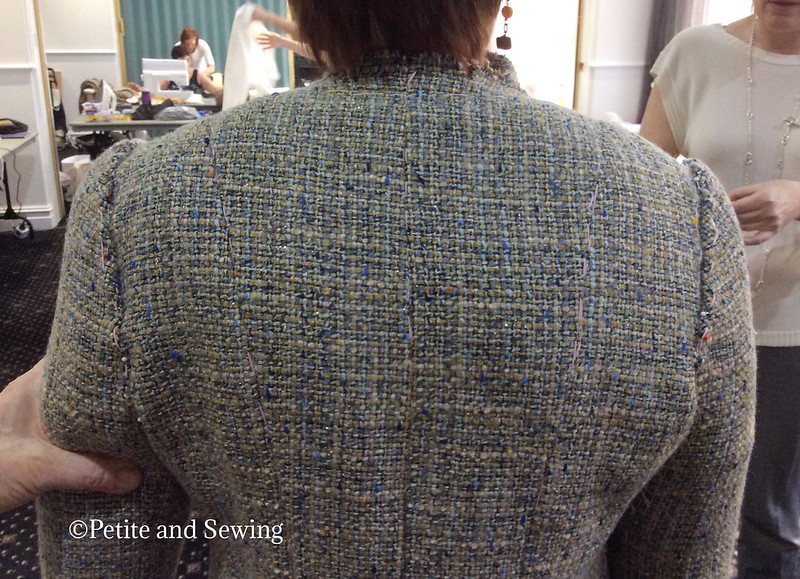
Once this seam was machined, pressed open, trimmed and the lining seam fell stitched in place the sleeves are then pinned in place by Susan and this is where my fitting challenge arose!

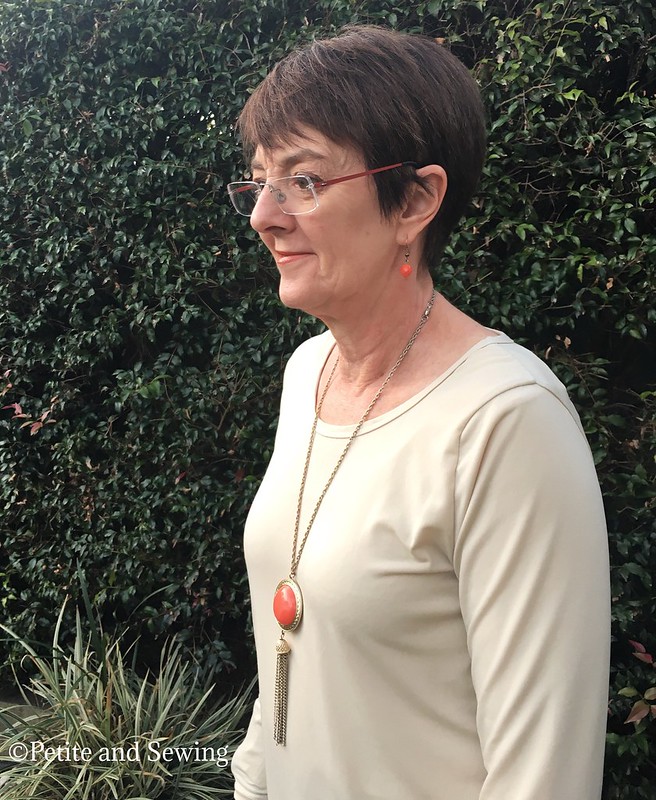
Can you see how the fabric is collapsing on my left hand side where the fabric is sitting very nicely on the right hand side?

It appears I am rather hollow there and it was very obvious in the soft structure of this jacket.

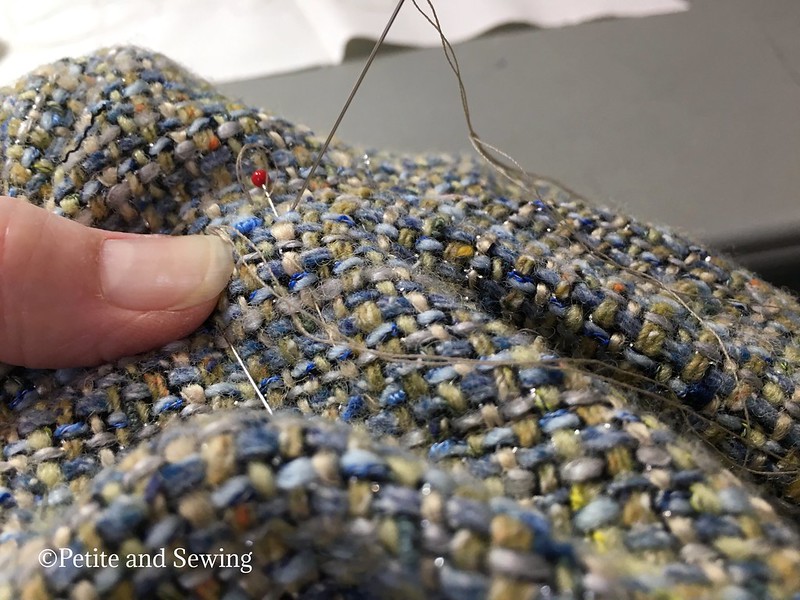
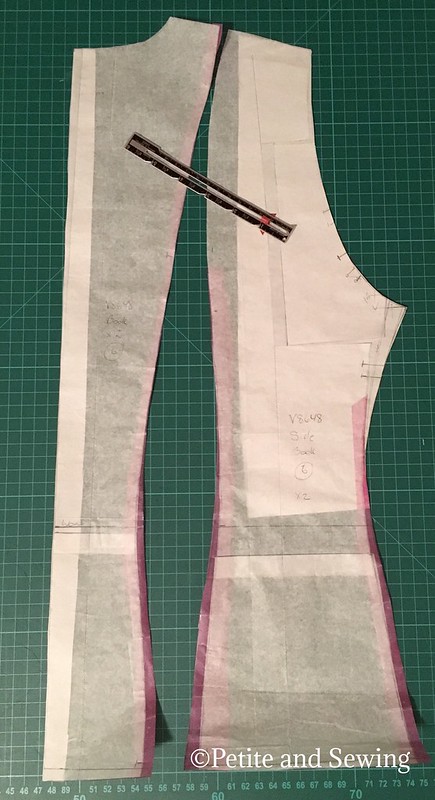
Luckily I had taken some slim shoulder pads to class and Susan took one of them and reshaped it it to look like this,

which when pinned in place filled out the fabric very nicely.

Oh and disregard the extra fabric I have at my under arms, this is not pinned in, you just can’t do it so it is left up to me to fit the fabric in the armsyce that “is left” after Susan has pinned in the sleeve cap.

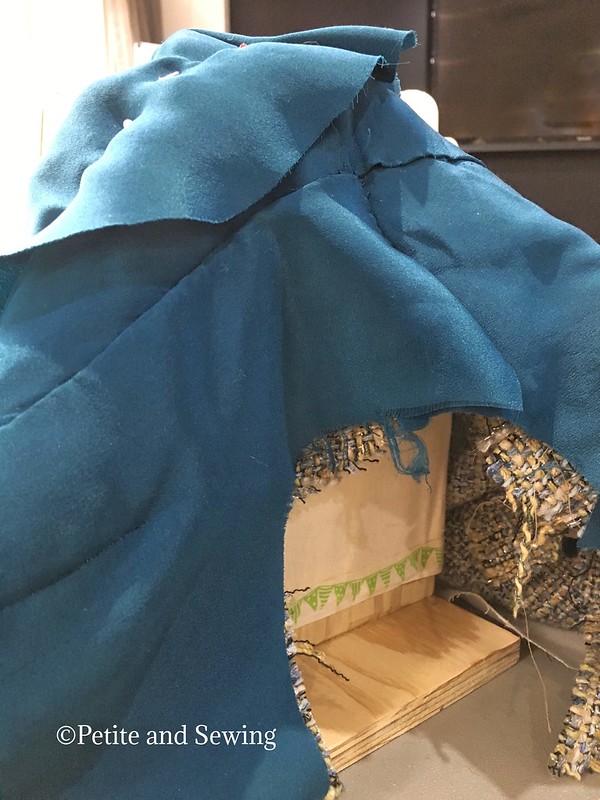
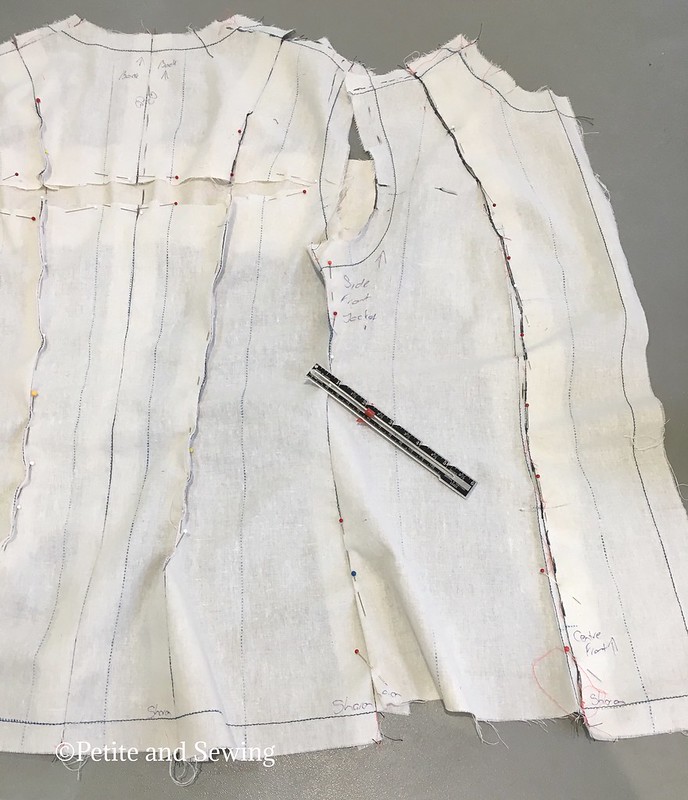
Now back to the hollow in my back, I have covered the shoulder pad that Susan had put together and here it is in the lining fabric,

and it will be hand sewn in place at the shoulder seam and this will let the edge of it sit beside the armsyce curve.

Once the sleeves are pinned in place, I then had to sew the sleeve in by hand, which feels quite insufficient but it is very solid and the drape of the sleeve is so much nicer.

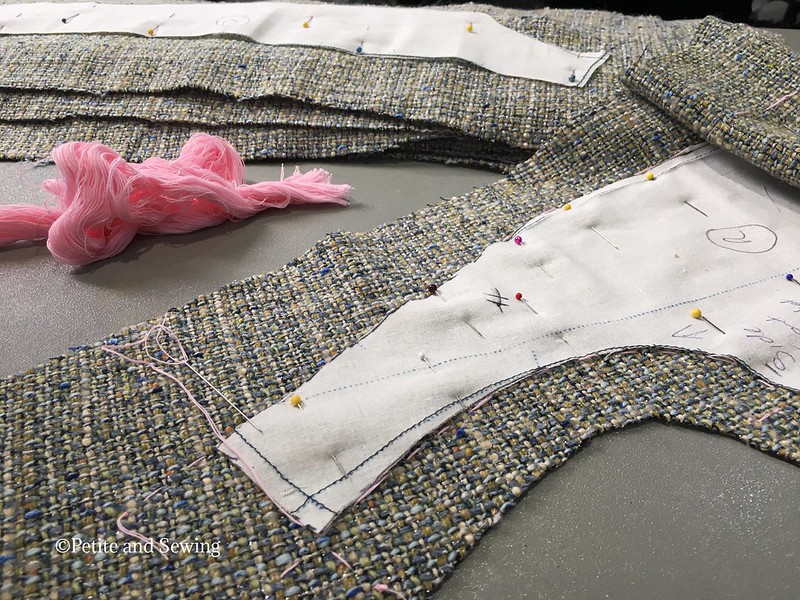
The next challenge was to attach the sleeve lining to the bodice of the jacket without getting yourself into a mess.  This is where the wooden sleeve head padded block that I purchased from Bernina Chatswood came in very handy.

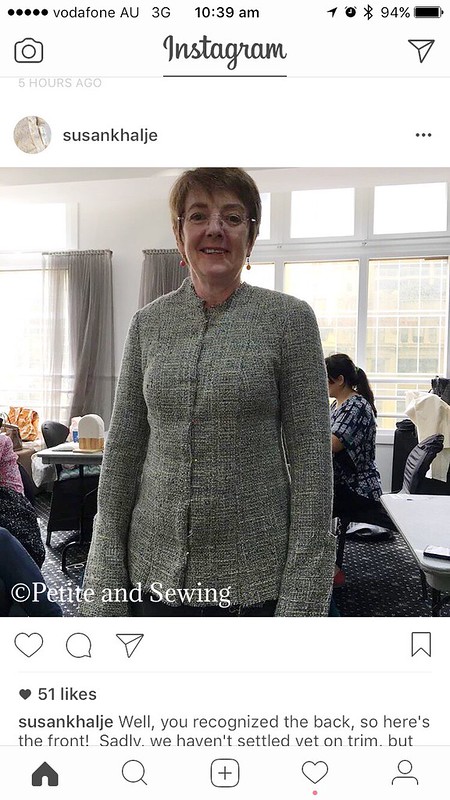
It is the last few hours of our course and a final try on

Yes, finding trim was proving to be elusive in Sydney so I sent a piece of fabric to my sister in Brisbane who took it to Sckafs Fabric and I was absolutely blown away by what they chose for my fabric
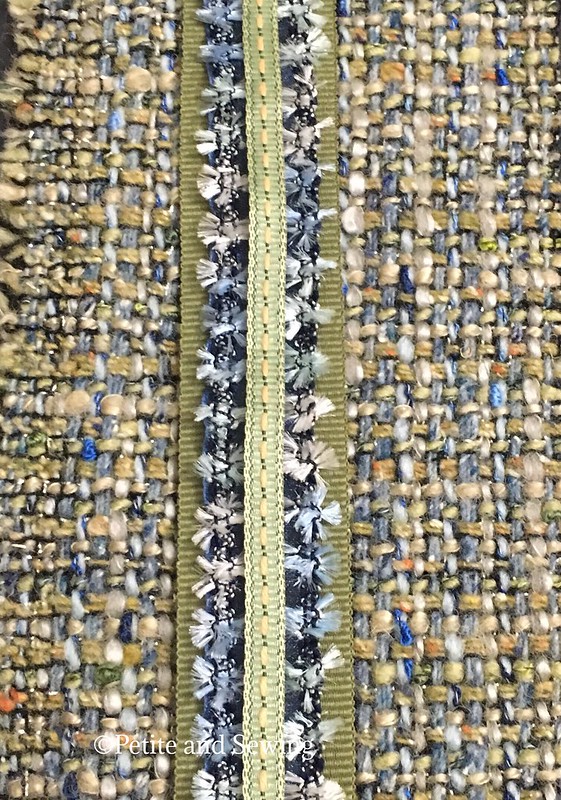
which consists of

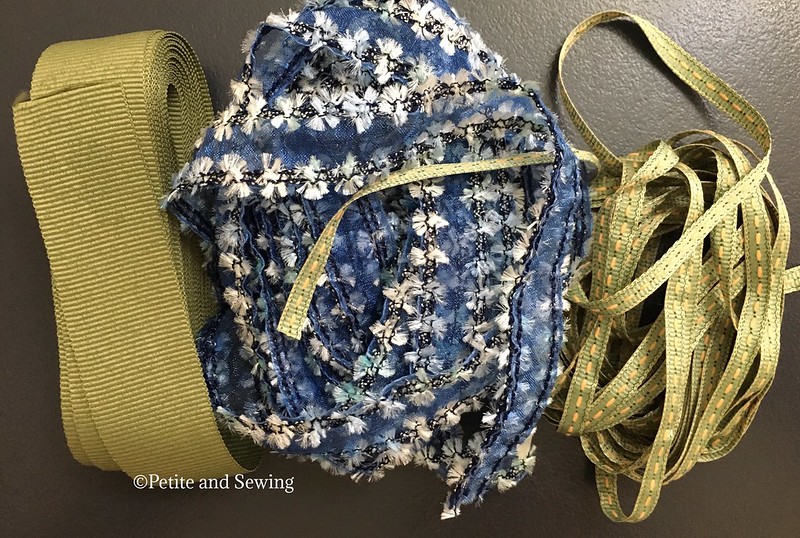
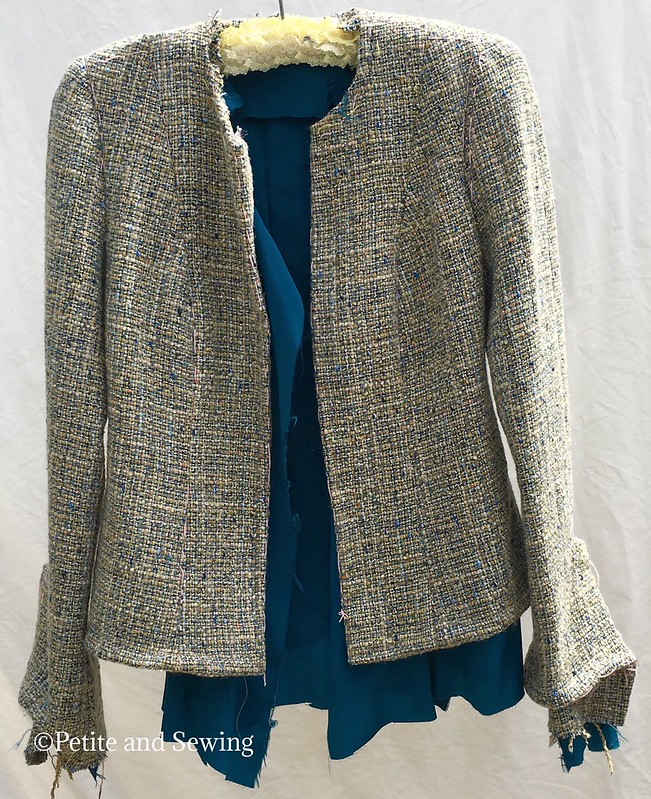
So at this stage my jacket is looking like this

To finish the jacket I still have to handsew:

  • all the jacket hems
  • sew on the hooks & eyes
  • sew the trim on, 3 layers so 6 rounds of sewing
  • finish the lining around the edges of the jacket
  • sew the chain to the back hem
  • find the buttons and sew them on
  • make the pockets and sew them in place
At this stage I’m not sure when I will be able to finish my jacket, but my hand is getting better and if I take it a bit at a time it will get done.
******************
2017 Stash Out – 11.6
2017 Stash In – 6.5

The Classic French Jacket class – Days 1 to 4

Further to my post here on the preparation, here is what happened over the next 4 days.

Even with my various toiles, Susan made a few more adjustments to my jacket.
Namely:
  • High round back
  • Took in the back princess seams slightly.
  • Shaved a bit off under the arm back to nothing at the waist and another reduction to the hips.
  • Flattened out the princess seam on the front and then letting it out from the waist down to the hips.
  • The shoulders were changed slightly but this changed again during the last fitting.
  • The sleeves haven’t been looked at at this stage, this isn’t done until the bodice is pretty much together.
I then took apart my toile, stitched in my adjustments making sure that everything lays flat and then cut off those huge seam allowances to get ready to start positioning the jacket pieces on the fabric to cut out.
Luckily my fabric didn’t have a major repeat or nap that I had to worry about.
The hardest part was to make sure that I had the 2″ of seam allowances on each side of each piece, this lets you handle your fabric without it disappearing in your hands.  I tripled checked it all before taking a deep breath and cut it out using my Kai shears.
Then it was time to baste all the stitching and grainlines in place using the Japanese cotton basting thread that I purchased during my week of Couture back in May 2015.
Once I finished all the basting the jacket pattern is removed (I still kept each piece together as they all started to look alike with the huge seam allowances) I then reinforced the “peninsula” of the side front pattern piece above the armscye with silk organza for stablisation and support.
Cutting out my silk lining is next, laying my fabric on top of the silk, getting my grainlines correct and then again cutting it all out.
Finally I got to set up my sewing machine to start quilting all 8 jacket pieces (normally 7 but I have a centre back seam).
Then I hand baste the main jacket pieces together (leaving the lining free) for my second fitting.

Again a few more changes were made to my jacket, only slight and this is where I was thankful that I had different coloured Japanese cotton basting thread as it made it much easier to see what the new markings were.

Next the 7 vertical seams are sewn by machine, pressed open, reduce the width of the seam allowances (not by much) of the main fabric.  I then placed my seams over my sleeve board so I could pin the lining in place and trim if necessary and fell stitch the lining seams together.

This is where the jacket is really starting to take shape and the weight of it and the amazing fit still brings a smile to my face.

There is still quite a bit more I want to document, the sleeves and a fitting challenge that I didn’t expect so I will be back next week with more.

See you soon.

Preparation for The Classic French Jacket class

This seems such a long timde ago, but I do want to document it.

In our detailed pre-class notes Susan asked us to bring to class “a fitted muslin/toile“.

I have made a couple of jackets using V7975 but my last jacket ended up being a Miss as it just felt too large and is currently back in pieces whilst I decide if I can salvage it.

Talking to one of my sewing friends who attended Susan’s class in Baltimore, highly recommended Susan’s pattern, The Classic French Jacket  as she found it had a nicer line and much less fullness over the bust and less ease in the pattern altogether, so this pattern winged it’s way to me.

The pattern envelope only contains 2 pages of pattern tissue, one for sizes 4-14 (bust sizes) and 16-24 (bust sizes). I started with a size 6 (e.g. bust 35″) which was closest to my high bust measurement.

However when I checked:

  • my measurements + ease
  • minus the flat pattern measurements 
  • it showed I needed to add quite a bit extra. 

Now most of you will know that I have been using TNT patterns for quite a while now, so starting from scratch took a bit of thinking.

During one of the Craftsy sales I purchased the “Fitting Solo – From Measurement to Mulsin with Linda Lee” class and this showed me a very logical way to make the necessary adjustments to the width.

The following adjustments were made to my pattern pieces:

  1. Neck line gaposis of 1cm
  2. FBA of 2.5 cm
  3. Added 0.4 fromt the waist to 1cm at the hip for each seam
  4. Full Bicep Adjustment of 5.5 cm across the 3 piece sleeve which was very well explained in Fit For Real People on page 172.
  5. The back pattern piece can either be on the fold or seamed.  I chose to seam it as I like the look of the back with the extra seam.

I then made up my jacket toile and headed to Studio Faro where I had booked a Sunday Afternoon Studio Session to work on my own project for some fitting help with Anita.

The following adjustments were then made:

1.  Lowered front neckline by 1cm
2.  Lengthened the sleeves by 1.5cm
3.  Shortened the length by 6cm

4.  Added more width to sleeves – 2cm at Biceps and 1.5cm at my foreaem, with nothing at the wrist
5.  Broadback adjustment of 1cm
6.  Dropped armhole and sleeve arms centre by 1.5cm 
7.  Added 5mm to centre back from neck edge to nothing at the waist.

and here are the pattern pieces ready for my 2nd toile:

Side front and centre front

Centre back and side back
Three piece sleeve

Which was ready for Susan to view on our first day of class, but which I forgot to take a photo of!

More to follow shortly.

Susan Khalje Couture Sewing School in Australia

I was so excited to find out that Susan Khalje was coming to Australia from the Australian Sewing Guild and you my have seen Kristy talk about it as well.

During her 2017 Australian Teaching School she is offering:

  • 7 day Classic French Jacket sewing class
  • 6 day Couture Sewing school
  • 3 day Guipure Lace skirt class
  • 2 day Couture Techniques class

I have always wanted to attend the Classic French Jacket class especially after reading about it on Melanie’s blog and I had planned on heading to Baltimore sometime in 2017.

So February is going to be a busy month for me as I have enrolled in 3 of the classes;

  • Classic French Jacket, 
  • Couture Sewing school, and 
  • Couture Techniques class.

Kristy also pointed out that Bewitched is having a closing down sale and I made a bee line for there a few weeks ago and found some ink navy wool crepe for the dress I am planning and a wonderful tweed for my jacket.

The Couture Sewing school had me thinking hard on what to do for this as we are not people who go to balls, or fancy dinners and I don’t have that very special birthday coming up soon either.  Then I remembered I had Susan’s Crafty Class – The Couture Dress using V8468 and after seeing the amount of different looks this pattern can achieve, I have decided to use this pattern for this class.

For the Classic French Jacket class I have decided to use Susan Khalje’s pattern –  The Classic French Jacket.

I have been working on my toiles for the last 2 months during my limited sewing time and have attended two Sunday afternoon classes with Anita from Studio Faro who has worked so hard with me to fine tune the fit of both garments.  Still one more round to go, but now I am more comfortable with the fit for when I meet Susan.

******************
2016 Stash Out: 0 m
2016 Stash In: 4 m