Winter Cardigan

During my trip back home from Tamworth back in May last year, at one of our stops I managed to loose my Merino cardigan that I had made back in 2011.

This was a great piece that could be worn open or wrapped around me to add an extra layer when it was necessary.

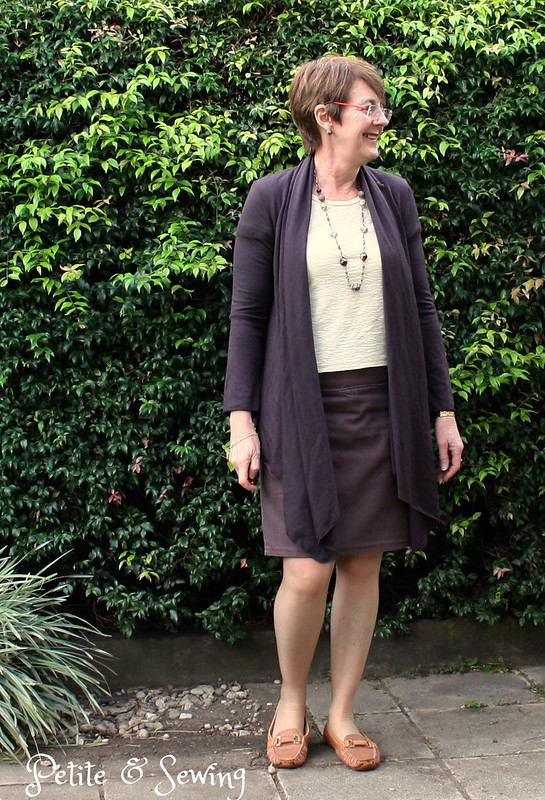
So the next time the Fabric Store had a sale, I was there to purchase enough Merino wool to specifically make another cardigan.

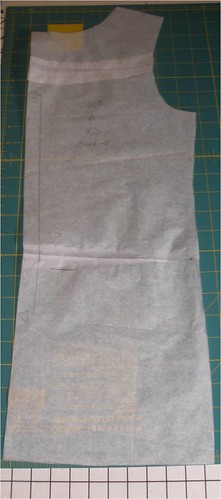
It then took me to January this year to finally get around to making it for our trip overseas.

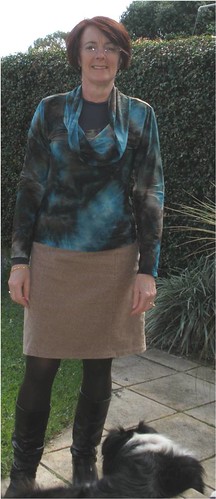
I again cut the front drape halfway between the short and long versions but what I didn’t take into account was the different drape of the merino wool.

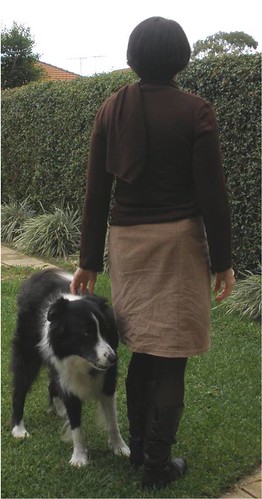
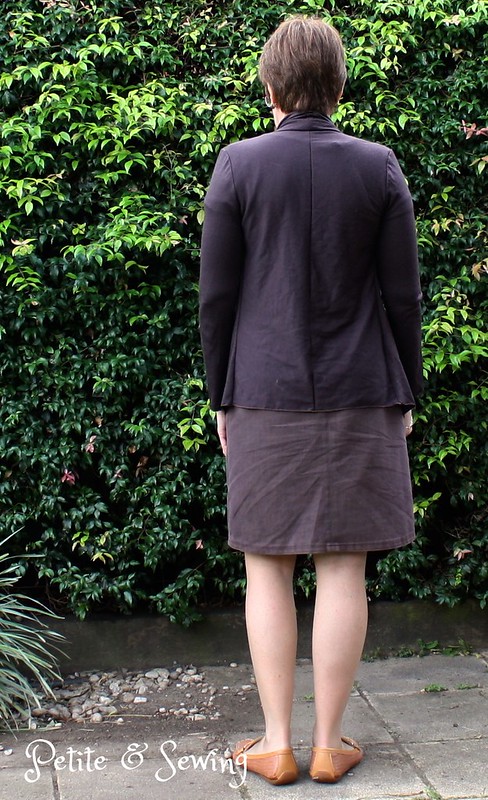
Short sleeves aren’t a good look under the cardigan.

The drape was not quite as long, so I couldn’t flip it over my shoulder and the sleeves were rather snug.

Thankfully the back covered my hips which was good.

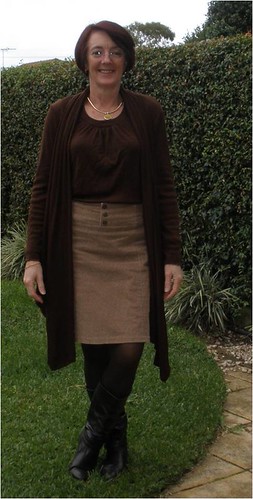
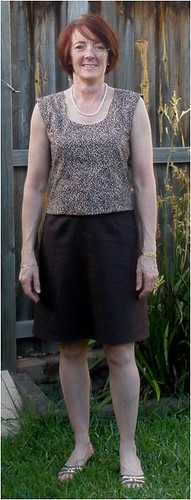
So I added 3 small metal buttons to the upper chest on the left hand side

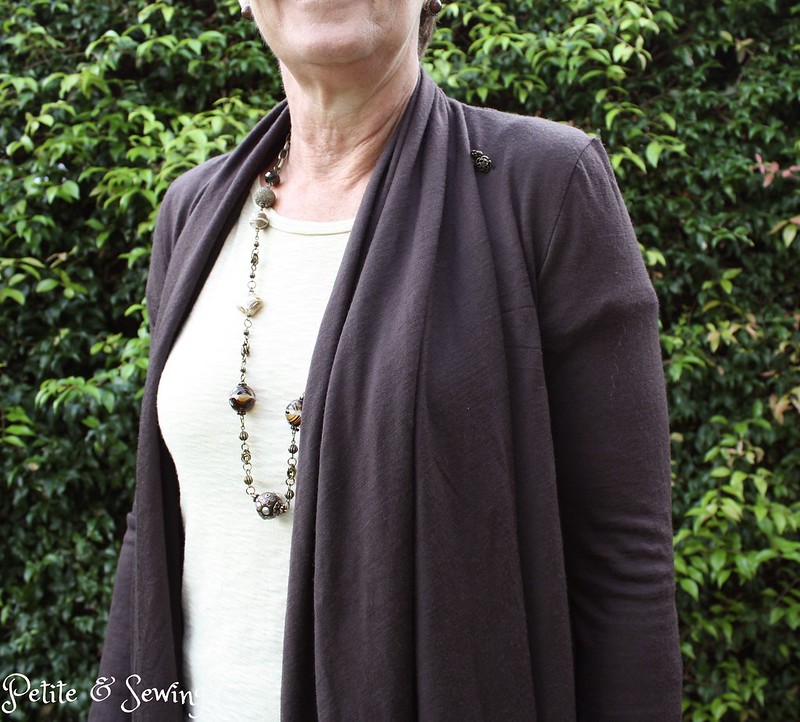
and sewed a thread chain about halfway along the other drape

so I could create another layer

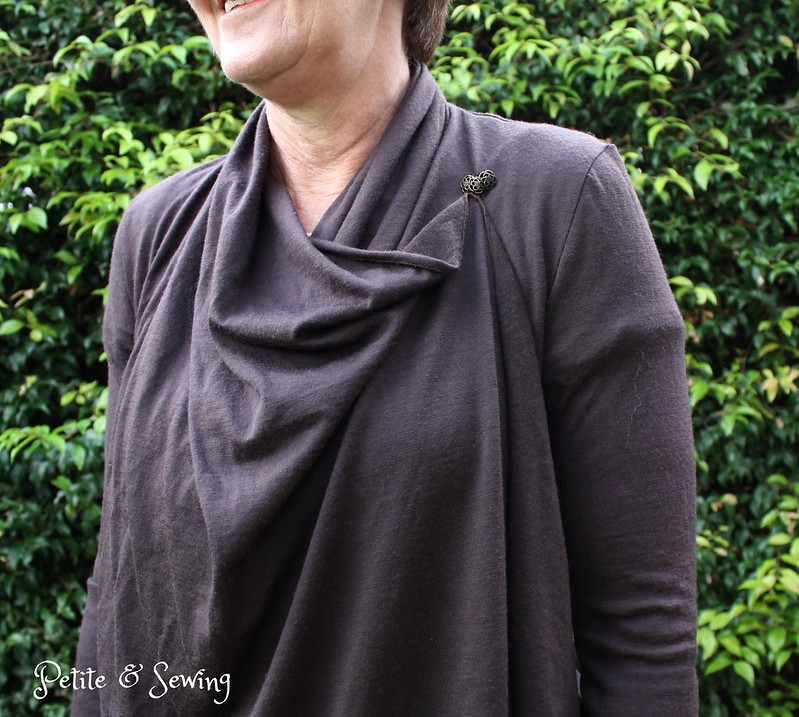
that looks like this.  The side of the drape with the buttons on it is tucked into the back waistband of my skirt.

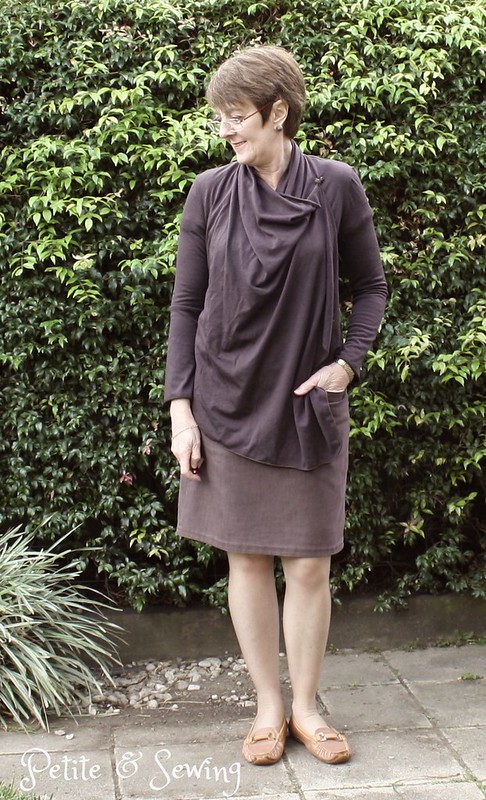
Even though the sleeves are snug and this is quite obvious with a short sleeved top underneath, when I wore it with long sleeves there are no other lines on the sleeves.

This was worn nearly every day I was away, it works with all of my tops and provided the extra layer I needed.

******************
2016 Stash Out: 5.3 m
2016 Stash In:  15 m

Saturday wanderings!

This morning Velosewer and I headed into the city early to take some photos and to find the bird cages that Up Sew Late had shown earlier this month.

We found them, unfortunately the delivery trucks were still around but now I know where to head back one day soon with DH.

Top: Sewaholic Alma blouse in tangerine woven poly worn on Day 4
Jeans: Jalie 2908 Jeans in brown denim (blogged here)
Cardigan: Simplicity 2603 in brown mercury jersey.
Accessory: Me-made necklace and me-made earrings.
Tights: Brown tights.
Boots:  Brown Sandler Sampson’s

I am wearing my new cardigan I made for SWAP and there are two differences from this one, the sleeves are longer and I have worked out how to enclose the back neckline!

Old cardi neckline
new enclosed neckline!

The SWAP photos are on their way so I’m heading out to dinner to start the birthday weekend celebrations as my actual birthday is tomorrow!

SWAP is completed!!

Yes I know on Sunday I said I still had 3 pieces to make, welllll

  • I only had to finish the hand stitching on this sequin top for my Evening collection (9th piece) and that has been done.
  • I had already decided to bring in a previously sewn garment as per the rules, this black wool skirt  for my Evening collection (10th piece).
  • then the only piece left was the all important cross-over piece, the Trench.

    After a semi frustrating day sewing the Trench at my Guild meeting last Saturday where I did more unpicking than sewing, I sat down on Sunday night and listed what was left to do on the Trench. 

    There are still 18 steps left to do and one of these is working out how am I going to install a metal zip into the curved collar for the hood.

    I really want to finish this Trench with care and attention to detail and I realised I was not doing this by trying to finish it for SWAP.

  • Therefore I needed a new cross-over piece, so I have gone to the other extreme in difficulty and made another version of Simplicity 2603 the waterfall cardigan as my previous version needs to be retired.

I will be back shortly with more details for the sequin top and the cardi wrap, but thought I’d leave you with this:

Sorry, got to investigate that noise!

Holiday Sewing

For my trip to the USA, I needed to organise a few extra layers as the temperatures where going to be around 6 degree Celsius, little did we know that we were going to be snowed on 🙂

First up was to change the neckline on 2 purchased thermal tops that I have for skiing (I still have a couple crew necks left).


With the assistance of my sewing buddies, I put on the thermal and then this top that I was going to take away and they then drew around the neckline with a chalk pen. I also checked that this neckline would work with my cross over top as well.


When I took the thermal off, I rounded off the chalk neckline and cut out the excess fabric, and then used fold over elastic to finish of the necklines. I also took the sleeves up as the original length was far too long for my tops.


The thermals worked a treat as they were worn just about every day we were away.

The next item was another Simplicity 2603 cardi and top with long sleeves.

This time I made the set up in a chocolate brown Merino Wool from The Fabric Store and cut the cardi front drape halfway between the short and long versions.

This length enabled me to take one of the fronts and tuck in into the back waistband of either my jeans or skirt

and then flick the other front side up over my shoulder.

giving me an extra layer across my upper body when the temperatures were very low.

Here is the top by itself and Roscoe being directed to stay out of the picture 🙂


The cardi went with all my tops and was worn every day. The merino wool washed and dried very well

Now to continue with my winter sewing.

Cardi for me

After making Mum’s cardi and top, I decided I had better get my act together and make mine.

I had some brown Mercury Jersey from Lincraft that was waiting for its turn, so the other week, after reading a couple of reviews on PR (got to love that place if you want to save yourself some frustration) I started on this project.

I didn’t do any adjustments to the Cardi pattern and only did some of my normal adjustments to the top e.g.:

High Round back and Sway Back.

Then I did the front neck gaposis and also continued this through the front neck facing.

  • I read yorkshire lass’s review and she did her “layout of the fronts single layer as directed but chalked the position of the first one onto the fabric then fit the other one around the chalked line. This way I got the two fronts way closer together than the layout suggests is possible”. This worked well for me as well and it made it a lot easier to cut out the front pieces as well.
  • I read some of the others reviews and decided to follow their leads and not sew the elastic in the back neck area. Instead, I gathered this area down to 5”. Then I sewed the back collar facing to the neck seam so the facing would stay down on the inside. This created a very stable collar so I don’t need to fuss when I put it on and it stays in place.
  • I deepened the armholes for both the Cardi and Top by 2cm (7/8″) and the sleeves fitted in nicely.
  • I made View D of the Cardi Wrap so I can’t do any of the wraps. I am wondering if I should shorten the cardi as I shortened the top by 5cm (2″).

So here is the top with my skirt from the Mini Wardrobe

and now with the cardi

Another one of the challenges for the 2010 SWAP at Stitcher’s Guild was that a garment will feature embroidery, beads or sashiko.

This is not something I have tried before and looking at the RTW it is everywhere.

Now Alison, one of my sewing buddies has the Professional Touch Applicator Wand and has just used it to add the bling to her daugters dress and shoes.

Well Alison has kindly offered to let me test drive before I purcahse this Wand and to help me along further Alison also kindly purchased for me at the Craft Expo in March two packs of Nail Heads. Here is what I came up with yesterday playing with the nailheads and I think I will do this when I catch up with Alison again and when I figure out how to mark the pattern on the neckband so it looks correctly spaced.

Oh I forgot to tell you that I have had some labels made to put into my garments. It is supposed to encourage me to finish my garments in a more professional way, unfortunately I can’t find a brown sharpie to hide the fact that I used cream overlocking thread LOL.

March Wrap-Up

This is a bit late as last weekend was a major sewing weekend and I will share more about this in my next post.

Now March didn’t see any new garments started, but it did see 4 garments finished and here they are.

First up is the brown linen straight skirt that was for the 2009 Swap that still needed hemming in January of this year.

Yes, I am wearing the same top and accessories with it as this one


As you can see, my wardrobe is rather limited.

Second on the list is the brown/coffee/coral linen that I showed you here. I used the same self drafted straight skirt pattern that I did for the brown linen above.

One of the challenges for the 2010 SWAP at Stitcher’s Guild was a matched print and I had never done one before. So I decided to challenge myself and match the centre back seam and using Nancy’s great tutorial I am really pleased how it has turned out, what do you think?

Now this skirt didn’t progress much until I attended one of my ASG groups in February and I only managed to get it hemmed when I visited DM in March.


Back

You will have to wait for another day to find out about the top I am wearing LOL.

The Third garment is the Top to go with the Simplicity Cardi that I made for my DM. I took this to her home the last weekend in March with my Coverpro to finish the hems and here is the final set.

and drum roll please for the Fourth garment……. the LBD is now finished.

Back view

The sleeves didn’t work, it appears that the wool that I used is a gabardine weave and has no give in it whatsoever and with the sleeves being very tight I had to change direction and make it sleeveless.

The other thing I noticed when trying it on is that it seemed to be very close at the correct length already. Luckily when DH levelled the hem for me I had a scant 1.5cm hem to turn up so I purchased some 2cm bias tape to add to this and here you can see:

  • A strip of fusable interfacing fused from the hem fold with a pinked edged 1.5cm wider than the finished hem width. This make your hem a bit firmer and you can then stitch your hem in the safe knowledge that NONE of your stitches will show on the right side of your garment.
  • Finished hem
  • Mitred corner for the split
  • Hong Kong finish on the other side of the split
  • Lace attached to the lining
  • A Diamond stitched to the top of the split to help stabilise this spot.


I also want to make a belt to go with this, if I can find abelt kit in one of the fabric stores.

Here are the pattern adjustments that I made if you want to check them out.

I’m still working on how to get better colours in my photos as the colour of the final dress IS the correct colour, however the lining and the diamond stitching close up shot is not.

Lucily I have this fabric to make a Chanel Jacket with my ASG group in May.

Weekend visit

My Mum came to visit me last weekend and I showed her the Simplicity 2603 Cardi that her other daughter had just toiled and offered to make her one. As these seem to be in all the fashion magazines at the moment it was a definite yes.

Lincraft was having a 50% off fabric sale so we came home with 3 metres of Mercury Jersey in Black (Mum) and Chino (for me).

Mum decided she wanted the shorter version of the Cardi so I made view D in a Medium. The hardest part of this pattern is the cutting out of the front panels, they are huge. The floor is the best place to do this, manoeuvring your self- healing mat around underneath the pattern piece so you have nice straight edges so you don’t have to hem Love Smileys. I cut the Cardi and sleeveless top out on Saturday afternoon and then on Sunday I had the Cardi sewn up in a couple of hours and the sleeveless top pinned for its first sit down at the sewing machine.

DS mentioned to me the small armholes and that she had made hers a bit deeper/wider and that this felt much better. I got Mum to try the Cardi on before inserting the sleeves and cut out about 1.5cm under the arm and then graded back to nothing just above the sleeve notches. This felt a lot better for Mum.

Here is a very happy Mum modelling her Cardi. This is how she thinks she will wear it, can’t see herself tying it in the front.

Now to finish sewing the sleeveless top and get this in the post to her.

***************

The LBD hasn’t been forgotten, you will see it soon.