Possum Yarn

I am someone who has to have something to do with her hands and as I can’t always take my sewing machine away with me on holidays or during lengthy road trips I cross-stitch but last year I decided to take up knitting again once I saw this Shawl Collar Jacket at the Turramurra Drapery stand at the Craft and Quilt Fair held at Darling Harbour in June 2009.


It is knitted in double moss stitch and uses TOUCH Possum Yarn. I’m so happy with how it fits and the design is so simple but classic.

I stopped off at All Buttons Great and Small in Newtown on the way home from work on Thursday and got this gorgeous hook and eye clasp.

I wore it in Thredbo last weekend and was surprised at how warm it was and can see that it will get a lot of wear next winter.

Simplicity 2648

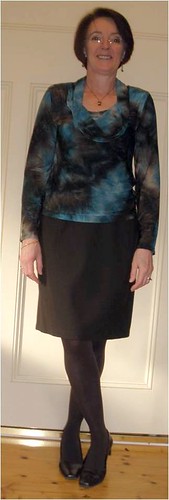
This is the dress I had fitted with Alison Wheeler during my Fitting Weekend.

I chose to work on this dress with Alison because it had sleeves and as you read here it was the main issue I wanted to work on.

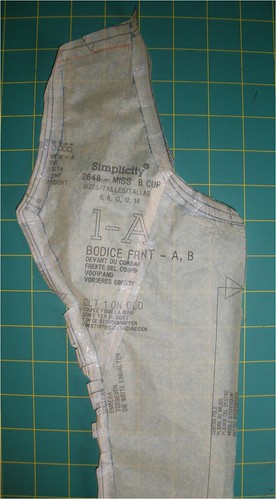
This is the first time I have used a pattern that has choices for cup sizes and whether you are slim, average or curvy. The decision for the cup size was easy, I used a B cup, Size 10, but it was when I had to work out whether I was slim or average that I got myself in a bit of a dilemma. I ended up using the average pattern size 12 for the skirt which turned out pretty correct.

Again I had my normal adjustments done:
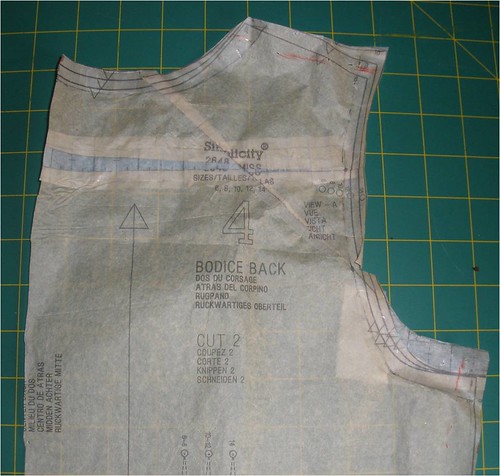
Back
* Round shoulder – 1.5cm added
* High round back – 1cm added

Front
* Round shoulder – 1.5cm removed
* 1.5cm gaposis taken from the front neck edge

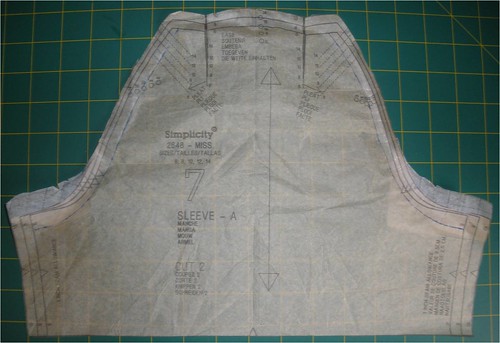
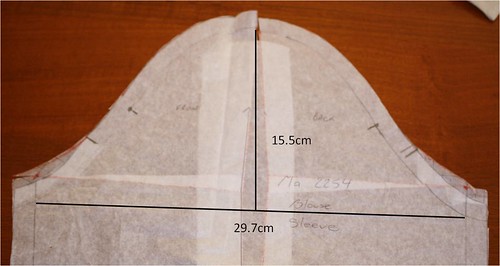
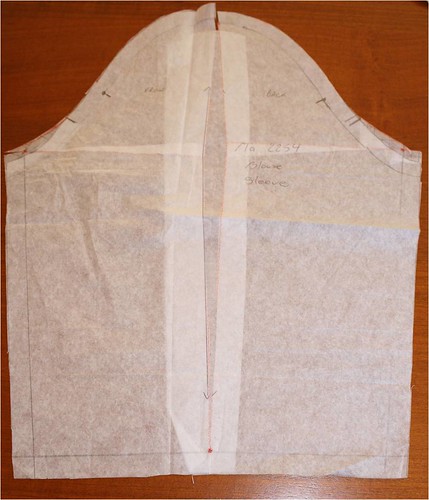
The first thing Alison did was check the sleeve cap height and got me to add 1cm to the sleeve and blouse armholes before she looked at any other adjustments.

Then further adjustments were made which then made my total adjustment list as follows:

Back Adjustments

* 1.5cm added back shoulder
* 1cm gaposis taken from the back neck edge
* Added 1cm to armhole edge
* High round back of 1cm”
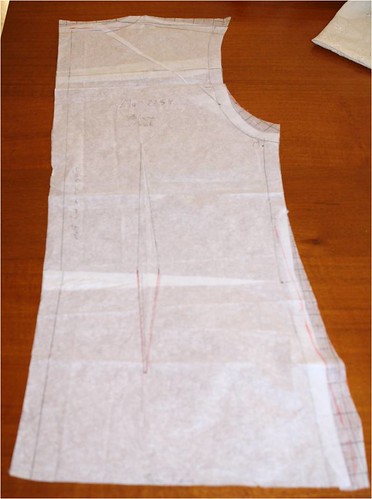
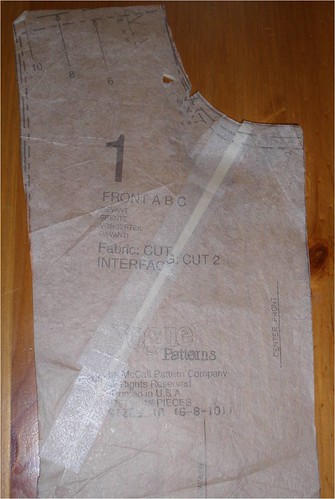
Front Adjustments

* Round shoulder – 1.5cm removed
* 1cm gaposis taken from the front neck edge
* Added 1cm to armhole

Sleeve adjustments

* Added 1cm to the side seams to match the armholes on the bodice

I had taken some brown linen that I had purchased from The Fabric Store with me for this dress and DS was rather horrified that I would use this for a toile, however with the adjustments we had done and the other fittings that we would be doing, I convinced her that it would be a very wearable toile.

DS then proceeded to cut this dress out, whilst Alison and I worked on the Marfy Skirt.

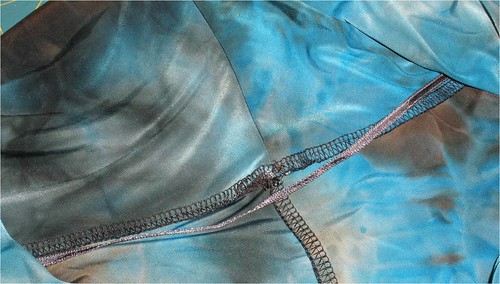
Between DS and I we got the dress basted together with the sleeves in for Alison to check. It was here that we noticed that the side seams needed to be straightened at the hips (I’m fairly straight there) and there was 2cm of extra fabric at the centre back seam, even though the side seams were falling correctly so this extra fabric was removed and then we played around with the darts and seams to match the bodice and skirt.

This is where the dress was up to by the time I left Brisbane and I cut out the lining and had the construction finished with the hem being sewn during our 10hr drive to Ballarat for the ASG National Convention so I could wear it to the Gala Dinner.

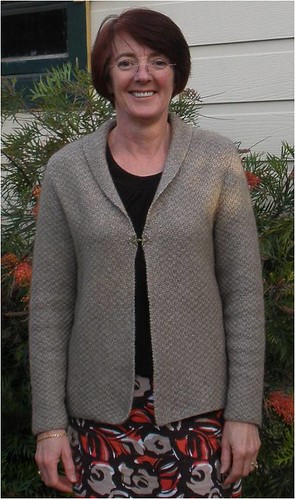
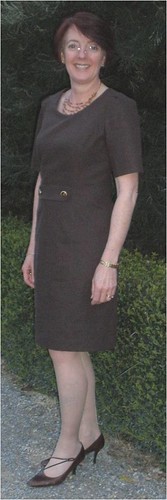
Here I am outside our accommodation (jacket off for the photograph, it was too cold to go to dinner without it!)

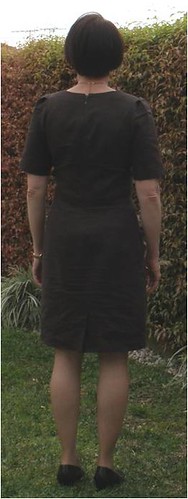
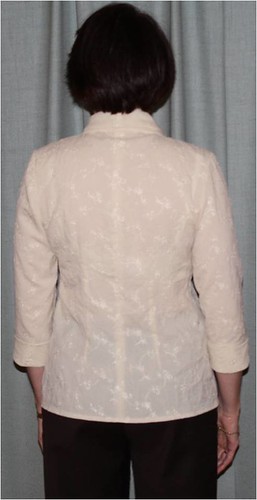
Here is the back view (in my backyard a week later)

and here is how the dress has been worn so far, under my Chanel Jacket. It will be a great dress for Spring.

I am very pleased with this dress and can see other variations being made. Alison also pointed out that I now have a good fitting skirt and top pattern as well.

I’ m a Winner

Two posts in 2 days, but I just had to show you what I received today in the mail.

Gay over at AND SEW IT SEAMS had a Give-Away for her 100th blog and look what arrived today:

# The latest Threads magazine.

# A Nicole Mallalieu Day Bag Pattern which I can’t wait to try.

# A Project Runway Brand Spanking New Sewing Case.

# 2 pkts quality interfacing – one is a woven lightweight the other a lovely Soft Lite Weft, definately not the SheerWeft I have been using.

# 1 pkt Jeans needles – size 80 – these will come in handy after my class at the Convention.

# and the cutest PINK tape measure in a cute little tin.

I’m going to have fun tonight playing with my new goodies.

Thank you Gay for such a wonderful treat.

A quick top

I’ve been admiring Alison’s top and finally bit the bullet and got myself Kwik.Sew 3740 and this fabric was just asking to be made up in it.

This is a very quick top, I traced off the pattern on the Saturday afternoon, and did my normal pattern adjustments:

  • Round shoulder
  • High Round back
  • Front neck gaposis, including this adjsutment in the cowl pattern as well.

On Sunday, after playing around with the fabric pattern placement, I cut it out, and stitched it up with my overlocker and it was ready for hemming that afternoon. Yes, it then took me another week to do the hems but here I am wearing it to work.

Back view

This fabric is very heavy, so I have added a ribbon across the back neck to try and keep in on my shoulders as it keeps falling off them.

I really like how they do the cowl with this pattern, you can’t see where it joins, the bodice and I top stitched the neck/cowl seam so it would stay under.

This is a great top and I can see quite a few in my wardorbe.

Seeing spots …

I am heading off to the Australian Sewing Guilds 9th National Convention being held at Ballarat Grammar School in Victoria, next Sunday and thought I had better make myself some new pyjama bottoms so I am decent.

I found this spotty flanelette at Spotlight at the beginning of this winter and have always planned to make pyjama bottoms from it.

The pattern is Burda 11-2009-131 (sorry about the french but it is the only way I can find a link) and this looks very different to my version.

I made the 36 and besides shortening them 7cm in length I have made no further adjustments.

I did stitch a triangle at the centre back to make sure the elastic stays in place and also threaded through some pale green ribbon as decoration.

Thankfully I have a t-shirt that works perfectly with my new pyjama bottoms as I’m running out of time to do much else.

Look who is being spoilt

Over at Pattern Review they are having a “Sewing for your Pet” contest and I decided it was time to spoil Roscoe (okay he is spoilt rotten, but what am I supposed to do), with a bed which is a bit better than the poor crocheted knee rug and what used to be a large sheepskin fleece that looks so small on his new bed (thankfully he has grown out of ripping things apart).

I have used McCall’s 3071 (OOP) which is for pet accessories and includes instructions and patterns to make a dog coat, dog bed and dog bed cover.

The inner bed is made from calico which wasn’t quite wide enough for the circles, so I added a seam in the centre. This takes 9 x 200g Craft Fiber bags to fill.

The patterned corduroy I have had in the stash for at least 14 years, I know I purchased it with the intention of making DH a pair of pull on pants to lounge around in, and yes he was wearing this sort of thing when I met him, I think they were left over from his surfing days.

I didn’t quite have enough for the whole bed cover so I purchased 1 metre of burgundy corduroy for the side panels and used a burgundy zip from my stash.

And this is a sight that every Border Collie owner wants to see, them sound asleep.

Marfy 2254

Time has certainly flown by since I last posted and even though I have been very busy, I have very little to show.

I finished this blouse at the end of June and it has taken me this long to get photos.

This is my very first Marfy pattern, so I was interested to see what adjustments I would need for their patterns as I love the designs they come up with.

As I said in my earlier post, when I had the fitting session with Alison I had my normal adjustments done, which are:

Back

  • Round shoulder – 1.5cm added
  • High round back – 1cm added

Front

  • Round shoulder – 1.5cm removed
  • 1.5cm gaposis taken from the front neck edge

I explained to Alison that I had been having major difficulties with woven sleeves, and this was the fitting issue I really wanted to work on. Alison explained that a lot of the patterns now have lower armholes and the cap height doesn’t suit everyone.

Alison then measured my bicep (27cm), and with the tape measure still around my bicep she measured from the top of the tape measure to my shoulder point which is the cap height (11cm).

Here is the Marfy pattern with the pattern tissue measurements, which showed the cap height on the pattern was 15.5cm, so Alison got me to add 1cm to the sleeve and blouse armholes before she looked at any other adjustments.

Alison then got me to do the following adjustments:

Back


• Take out the High round back and replace it with a 8mm gaposis from the back neck edge
• Added 1.5 cm at the centre back neckline, take back to nothing at the shoulder seam
• Added 1cm to armhole
• Added 2.5cm at side seam tapering back to the normal seam towards the armhole

Front

• Added 1cm to armhole
• Added 2.5cm at side seam tapering up to zero towards the armhole
• Shortened the dart by 7.5cm

Sleeve


• Added 1cm to the side seams to match the armholes on the bodice
• Bicep adjustment of 2cm

Here is the completed blouse at the end of a days work:

Front

Back

Notes for next time:

  • I have managed to put one of the sleeves in wrong, it needs to be rotated back by 2cm.
  • The cuff is too tight where the sleeve joins it, so I will straighten the sleeve side seams a bit each side and add the extra to the cuff as well.
  • You can see a slight ridge near the neckline of my blouse, this has been caused by the 1.5cm that was added to the back neck edge. This will be removed for future blouses.
  • I will probably make the back darts a bit deeper and add a small bust dart at the front.

I have some silk that I want to make this blouse up in and it will be a good Spring addition to my wardrobe.

Fitting Weekend

I’m back home after a fantastic 3 day weekend having patterns fitted by Alison, “The Sewing Lady” in Brisbane.

This was my birthday present from DS, a full day of fitting on the Saturday with Alison and then a general sewing/fine tune fitting on Monday morning.

This is how it worked, there were 3 attendees for the fitting day which included both DS and I (this was all day Saturday, a maximum of 4 attendees for these days and they get booked out well in advance) and I managed to get 3 patterns fitted:

Simplicity dress 2648, View A with sleeves.

Marfy blouse 2254 and Marfy skirt 2253 (the free patterns included in the Marfy 2010/11 Annual).

Sunday was sewing at DS’s home in the morning and then we met Alison at Sckafs, Indooroopilly to learn about what to look for when choosing fabrics, trims, interfacings, etc which gave me quite a few light bulb moments.

Monday was back at Alison’s for the morning session of general sewing with 4 attendees (maximum of 8) so we tweaked the dress, sorted out the blouse and the skirt is underway. I’ve still got a long way to go on the dress and skirt, but the blouse is closer to finishing so you will probably see it soon.

The reason so much was achieved was I had all the patterns with my normal adjustments done, taped and pinned together when we arrived on Saturday. Luckily only 2 people (me being one) were having patterns fitted that day which was fantastic. Alison fitted the paper patterns on me and I made the additional changes to the paper patterns, then DS (my birthday slave) cut out my fabric, pinned up the fabric toile for the next fit and then she got into the actual sewing of the garments, this was at the classes and at her home. I also managed to contribute to the sewing on Saturday night and Sunday morning.

This was a fantastic birthday present and one I will remember each time I wear one of the above garments.

I will share more information on each of the patterns as they are completed so until next time …

Not much sewing going on…..

May is turning into a month of hemming projects and preparation, but no actual garment sewing.

As you saw in my last post I have been busy shortening hems on my t-shirts, and have finished another 5 since (1 of mine, 2 for my DM, 1 for my DS and 1 for a friend of DM’s) and then DH hands over two pairs of work pants that need hemming as well (1 pair is still hiding in the sewing room LOL).

Then last Saturday at our monthly ASG meeting at Rhodes, Angie Zimmerman* talked to us about Chanel Jackets and then proceeded to help us adjust our patterns.

This was the prompting I needed to start the Chanel jacket that I talked about here.

I wore the Chanel jacket that I made about 3 years ago so Angie could see where it was overlapping at the top of the centre front, and the adjustment was a 0.5mm tuck in the neckline tapering to zero at the bust point.

The remainder of the day was spent cutting out the tweed and interfacing. Yes I am going to interface the whole jacket with Sheerweft just to give it a little more body and keep the tweed together. This is as far as I got on this project.

This week I am preparing 4 patterns to take to Brisbane with me on Friday for a long weekend to attend a Fitting Workshop with Alison Wheeler** and maybe by Monday I will have some garments to show you, so keep your fingers crossed.

*Angie Zimmerman writes a lot of articles for Sewing with Stitches Australia (formerly Australian Stitches) and also has her own sewing workshops.

**Alison Wheeler operates her own sewing school, “The Sewing Lady”, in Brisbane. She is an experienced dressmaker and teacher offering a wealth of knowledge and information to her students across a wide range of sewing techniques.