Weekend visit

My Mum came to visit me last weekend and I showed her the Simplicity 2603 Cardi that her other daughter had just toiled and offered to make her one. As these seem to be in all the fashion magazines at the moment it was a definite yes.

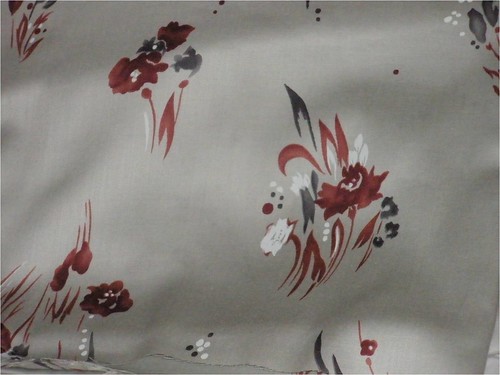
Lincraft was having a 50% off fabric sale so we came home with 3 metres of Mercury Jersey in Black (Mum) and Chino (for me).

Mum decided she wanted the shorter version of the Cardi so I made view D in a Medium. The hardest part of this pattern is the cutting out of the front panels, they are huge. The floor is the best place to do this, manoeuvring your self- healing mat around underneath the pattern piece so you have nice straight edges so you don’t have to hem Love Smileys. I cut the Cardi and sleeveless top out on Saturday afternoon and then on Sunday I had the Cardi sewn up in a couple of hours and the sleeveless top pinned for its first sit down at the sewing machine.

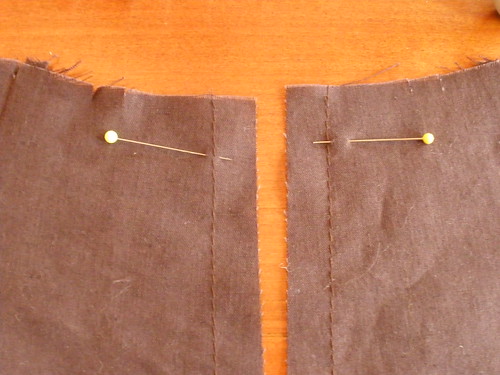
DS mentioned to me the small armholes and that she had made hers a bit deeper/wider and that this felt much better. I got Mum to try the Cardi on before inserting the sleeves and cut out about 1.5cm under the arm and then graded back to nothing just above the sleeve notches. This felt a lot better for Mum.

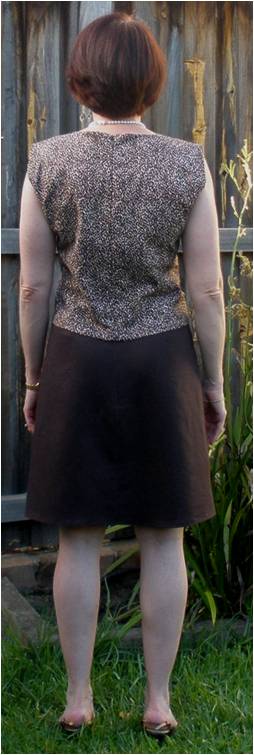
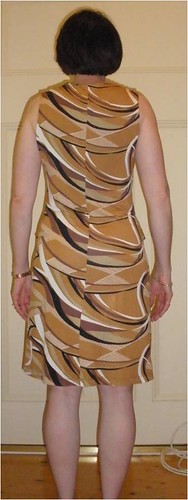
Here is a very happy Mum modelling her Cardi. This is how she thinks she will wear it, can’t see herself tying it in the front.

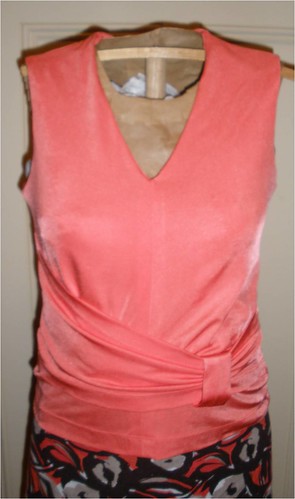
Now to finish sewing the sleeveless top and get this in the post to her.

***************

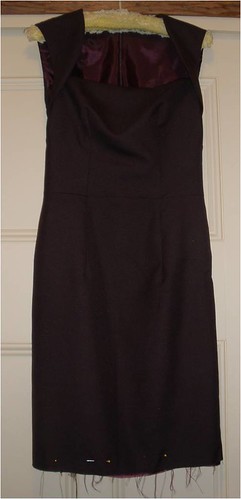
The LBD hasn’t been forgotten, you will see it soon.

LBD Update

Is nearly there –

and I need to get off the computer and get this done as I want to wear it to a function on the 30th.

*****************

It was warm enough today to get a photo of me wearing my new coral top – BWOF-05-2008-103 which you saw on Isabel for the Six Piece Sew-Along.

It will also go with both the A-line and straight skirts I showed you yesterday.

I’ve been dreaming ….

of this outfit since before Christmas and managed to cut it out on 2 January 2010.

It started with some very soft dark bown linen that I purchased from The Fabric store last year, and this Japanese Cotton that my DS gave me over 12 months ago.

I have used McCalls 2029 (OOP) which is my TNT A-line skirt that I love. I have changed the lengthwise grain for the front and back pieces so the fullness of my skirt hangs evenly around the skirt. Okay it does mean that I have centre front and back seams on my A-line skirt but I prefer not to have all the fullness at the sides.

The skirt is fully lined in Sun Silky, and I used my rolled hem foot on my sewing machine to hem it and the invisible zip from the tutorial is in this skirt.

For the hem I overlocked the edge, turned it up that amount and stitched it from the right side.


This top was supposed to be part of my 2009 SWAP however life got in the way. It is based on Vogue 1822 (OOP) that has been adjusted to within an inch of its life, and has given me a number of great tops.

I scooped the neckline this time and made it sleeveless. This is also fully lined with Sun Silky and also has an invisible zip which took me 3 goes to get the positition right, but with the basting stitches it was soooooooo easy to take them out and do it again until I was happy with the position.

This top will also go with this brown linen skirt that arrived in the same package as the Japanese Cotton from DS.

It was also part of the 2009 SWAP and has been hanging in the cupboard waiting for me to hem it for such a long time.

Invisible Zip Tutorial

At our sewing weekend, Gayle asked if anyone knew an easy way to put in an invisible zip.

This is the method that my DS showed me many years ago which I have used ever since with 100% satisfaction and you will see that you have the chance to fix any issues before those small stitches are sewn.

First up I machine baste the seam allowance on both pieces of the garment. I am working on a skirt for this tutorial.

Then I place a pin 2cm down from both top edges of the garment pieces on the basted line. The reason I use 2cm is 1.5cm for the seam allowance and then I leave a .5cm for a hook and eye. You can place the pin at 1.5cm so it sits flush with your facing.

Tuck under the seam allowance (basted line) and line up the zipper teeth with the baseted line and the zipper stop with the pin. This step lets you check if you are sewing it to the correct surface.


Then fold the seam allowance back out and then pin the zip in place on both sides.


I then baste the zip in place using the normal zipper foot, sewing from the top down on both sides, it doesn’t have to be right up against the zipper teeth, this is your safety net to make sure that the zip is where you want it to be.


Now do up your zipper and check that is where you want it to be.

If the zip isn’t where you want it to be then you can easily pull out the last lot of basting stitches and redo them until the zip is in the correct position.

If it is all aligned, then using the “invisible zipper foot” open the zipper and place the zipper teeth into the grove on the foot ensuring that the needle is on the correct side of the zipper teeth. I move my needle position 2 postions from the centre either way (depending on which side I am sewing) and use my finger to roll the coils away from the needle as I sew. Sew from top to bottom on both sides with your regular stitch length.


Here is the zipper sewn in.

The seam below the zip can be sewn first or last, and this tutorial works perfectly for both.

Completed back seam

Okay you now have to take out two rows of basting stitches, but they are a lot easier to remove then those smaller stitches.

The next step is the facing finish and if you have Australian Stitches Vol 10, Issue 10, Martyn Smith demonstrates this step-by-step on page 20. There are also a number of tutorials available on the Internet.

Six-Piece Sew Along

Stitcher’s Guild is holding a Six Piece Winter Sew Along (December to March) although with the differences in the hemispheres, some of us from “Down Under” are doing a Summer collection e.g.

SUMMER
Dress
Skirt (accent colour)
3 blouses/tops (1 to match skirt, 2 to complement)
1 light layering top/cardigan

I am in desperate need of summer clothes, so I am making:

Dress
Brown patterned dress BWOF 05-2008-104 – completed

Skirt
An A-line skirt using McCall’s 2029 OOP in this Brown/pink/orange/coffee linen


Blouses/tops
1. Matching top in the above linen- pattern to be decided
2. Cream bamboo knit – pattern to be decided
3. Coral knit that DS gave me in BWOF-05-2008-103 – completed. I have made this top before here.

Here is the top on Isabel where I have draped the linen to see if they work together.


Light layering top/cardigan
This I am still trying to figure out.

**********************

I had a few questions on “A New Me”

Jenni asked Has she a name yet?

Yes, her name is Isabel, after my DM who was the one who taught me to sew and sewed for me for many years when I was younger.

Kbenco It sounds so much easier than a duct tape dummy, with the tape holding rigid by itself (is this correct?)Is there another name for framer’s tape? I am not familiar with this product? Is it tape used for picture frames – and where do you buy it?

Yes the tape is used by framers for the back of the picture frames. It has to be dampened to stick. DS purchased it from a craft store, it comes in a large roll. The tape isn’t rigid until it dries, then it can stand by itself.

2009 – Sewing Wrap-up

Hoping you all had a fantastic New Year and wishing you plenty of sewing in 2010!!

Well where did 2009 go?

I’ve been reading a lot of sewing blogs lately and seeing what everyone has achieved in the past year.

I really had no idea of what I had completed and this is where having my blog does come in handy as I know that I have shared with you each of my accomplishments. So what was the total – 9 garments, namely:

2 x Dresses
3 x Pants
4 x Tops

Unfortunately there is a dress and a skirt that should be included in this count except they haven’t been hemmed. For some reason this part of the sewing process seems to be a stumbling block for me.

Favourite Garment

This is the one that I wore the most and it would be The Stripey Top that I wore to work with trousers and skirts and then on the weekend with my jeans, it is such a versatile top. Thank you again DS for sending me the fabric.

Highlights

  • Sewing with sewing buddies.
  • Going fabric shopping with my sewing buddies.
  • Having a great overseas holiday with DH and buying fabric LOL.

2010 Sewing Goals

  • Complete 1 garment a month,
  • Complete at least one competition either at Stitchers Guild or Pattern Review.

2010 has started off nicely as I have just finished a top, will share soon.

A new "Me"

My DM and DS gave me this wonderful gift as part of my Christmas present

So yesterday they arrived at my home all ready to wrap me in a dry cleaners bag and then proceeded to stick framers tape from my neck to my hips (widest part) to create my body form.

After an hour this is what I looked like from the back, the whole body is done but the front is TMI for public viewing, with very sore legs from standing still for so long (please excuse my messy cupboard, DH didn’t think to close the door before he took the photo.)

At this stage DS took a measurement of my hip area for reference further on.

This is then cut up the back and you carefully step out of it and then stick the cut back together. This is your opportunity to check that there aren’t any thin spots and if so you can put more tape on the inside of the form so as not to distort the outside widths. You then use your hair dryer to dry it is as much as you can.

We then stood the form on a piece of paper and traced around the bottom edge, then took a tape measure on its side and measured around it to make sure that we hadn’t added/subtracted any width from the measurement taken above. The template was then cut out and checked to make sure that it fit in the bottom of the form and then a cardboard base was cut out with a hole in the centre for it to be placed on a stand, and then you carefully tape the base to the body form.

Now DM and DD did this for me about 9 years ago and with putting on weight (yes it was intended) and gym work the body has changed a bit so my old “me” wasn’t a usable sewing aid for fitting garments.

When I first started sewing I purchased one of the adjustable manequins which just wasn’t shaped the way I am, so we discarded the top and this is where my “old” me was hanging around. So we cut off the “old” me (on the floor) and put the “new” me in her place.

My shoulders are sitting on a wooden coat hanger which is attached to the pole. You then roll up newspaper and drop this into the cavity to stop it from collapsing (don’t worry the tape drys as hard as a rock, it is more for when you press on it).

My new dress form will come in very handy for the top I am currently making so I had better get back to the sewing room.

Frustration and Smiles !!

The LBD has been challenging my sewing skills and knowledge of late and after much deliberation I have decided to make it sleeveless. My fabric after closer scrutiny is a Ronaldo Wool Touch Brazil Suiting. Now I really didn’t know what this meant, but I know now this is a fabric that does not like to be eased, has very little if any give to the fabric, and with the tight sleeves of this dress the two were not a suitable mix.

I spent last Saturday at the Alexandria Achievers ASG Group doing a lot of frog stitching and managed to work out how to change this dress to a sleeveless version. It is still not 100% to my liking and instead of rushing it and “just getting it done”, I have put it aside this week to restore my sense of achievement.

**********************

This is BWOF 05-2008-104 which is the longer version of this top I made in January. My inspiration came from a dress by Phase Eight I saw in a magazine and my fabric is from KnitWit.

As I had already done the pattern alterations for the orange top, I only had to extend the pattern to a dress and trace off the new band to incoporate the buckle that I purchased when we visited Victoria Island in Canada earlier this year.

I cut this fabric out on Friday night and then on Saturday with my sewing buddies I got it up to the hem stage, and then today after DH levelled the hem for me, I hemmed it with my Janome CP 1000 (I had also used this for the hems on the band) and wore it to the Rhodes Fashion Sewers ASG group for their Christmas Lunch. (You read correclty I attended two ASG Groups and sewed with my regular sewing buddies this month.)

This knit has more stretch than the top I made so the neckline is a bit lower than I normally wear and it did take me quite a few tries to find a necklace that worked, and I can see that I need to find one similar to the one they have pictured with the inspiration dress.

Here is the view from back once I got home.

Cheeky Cross Stitch

One of my other passions is Cross Stitch, however I don’t get a lot of time to do this.

I have had my eye on this Dolly Mamas pattern for quite some time as it is my DDS all over. I finally bit the bullet and stitched it for her for her birthday this year.

My local framer did a fantastic job of framing it for me. He used the hot pink in her skirt as the first mat and then black as the larger one with a black frame. Unfortunately the photos that I took had too much reflection and I had to get it in the post to reach DDS for her birthday.

I got a very excited phone call the day of her birthday to say that she loved it and it was so correct, then I had to admit it was supposed to be for last year’s birthday LOL.

When the cat’s away …

I’ve been working some incredible hours over the past month, so today, as the boss was heading to the airport to fly overseas for 5 days, I took the opportunity to have a massage and then go to The Fabric Store as they had a 30% off Sale for today only.

This is one of my favourite fabric shops in Sydney and there is always something there to tempt me.

Whilst wandering around I heard a “Sharon” and turned around and Sandra (who was also signed up for the “Go Chanel Go Home Sewalong”) introdued herself. We had been emailing each other about our Chanel jackets as we had both purchased the exact same fabric for our jackets at The Fabric Store. Needless to say Sandra’s Chanel jacket is a lot further progessed than mine.

It was so nice to meet up with someone that you have blogged/emailed with and the fact that we fell right into chatting about fabric and what we were going to do, was such a treat and reinforces even more to me that the friendships that are created in the internet world are wonderful.

Now do you want to guess what colour I purchased?

This is a Japanese cotton that I plan to make a top out off and it will go brilliantly with the burgundy wool pants I made in August. I also have enough of the burgundy wool fabric left over for a skirt.

Yes, you guessed right, here is the brown linen and I couldn’t pass up this cream linen either.

I’ve seen a Chanel Inspired jacket and I am really keen to try and get the same sort of look. I ended up with what was left on the roll of the brown linen 4.5m (paid for 4.3) and 1.5 metres of the cream linen.

The plan for the linen is the Jacket (cream with a brown band or brown with a cream band), a simple sleeveless shift dress, pants and a skirt and with careful cutting out maybe a sleeveless shell top.

Now I’m not saying when this will be done, however I am in desparate need of summer clothes so I had better get back to finishing the LBD.