Is shattered too strong a word …

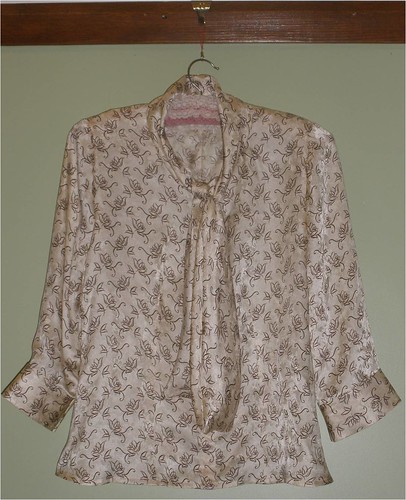
I reached into my closest pulled out my skirt and put it on, then again for my blouse, did up the buttons and then bent over to get my shoes, oh no (the polite version), over to the mirror and this is what I saw.

I’m at a loss as to what happened.

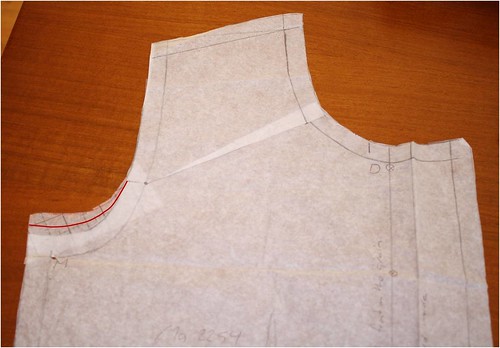
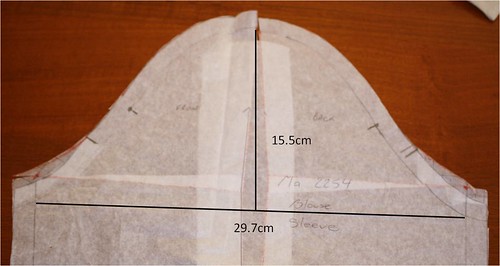
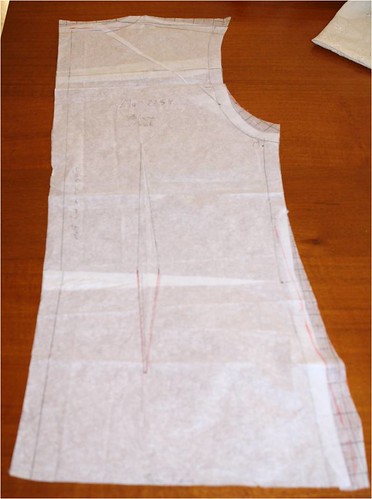
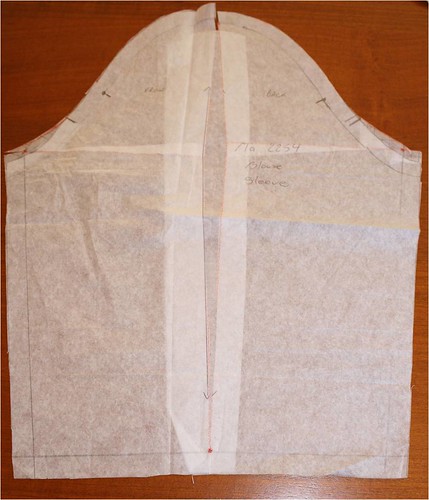
This blouse has been toiled, and had a test fitting again before I cut out the silk where we did some minor adjustments to the sleeve depth, that is all. After I put in the sleeves it did feel a bit snug, but then the blouse I am wearing today, feels the same. I even checked the centre back seam and armholes to see if any of the stitching is strained, but I can’t see any.

DH’s comment was that I could make another, true but no more silk in the stash so do you think that he has given me permission to purchase some, sounds like it to me.

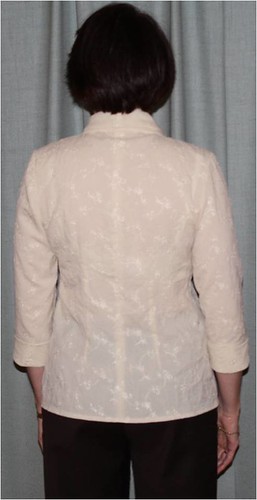
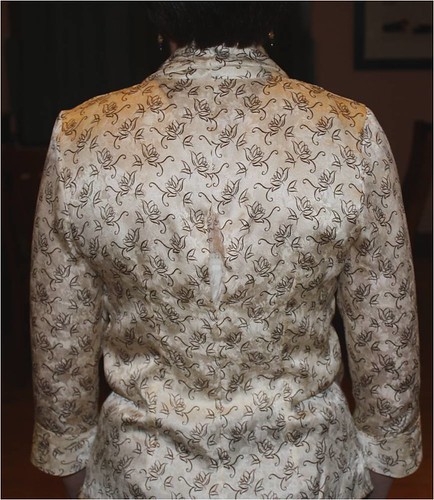
So this is what I wore to work instead:

Blouse: Marfy 2254 (blogged here)
Skirt: Self Drafted Skirt in brown linen, interlined (to help stop the wrinkles) and lined in Sun Silky
Jacket: Purchased Chanel style jacket in brown, tan and lemon tweed
Shoes: Diana Ferrari

We are heading south for the long weekend and I’m not sure I will have Internet connection so you may not see me until Tuesday.

Have a great long weekend (sorry WA but enjoy your weekend as well) and be safe on the roads.

Silk Blouse

At our ASG meeting in April, Angie Zimmerman held a workshop for us to discuss the various techniques for working with silk and also gave us the opportunity to get patterns adjusted.

I decided to get Angie to give my Marfy 2254 blouse a fine tune so I could finally use the silk that I purchased in China for this blouse.


Angie made very minor changes to my original toile:

1. Took off the 1.5cm at the centre back neck edge that was added.
2. Reduced the armhole and sleeve additions by 0.5cm (half of what we added).
3. Increased the cuff and sleeve edge width so that the cuff doesn’t grab my arm.

Here is what we did to the front pattern and then did the corresponding adjustments to the back and sleeve.

Then it was time to cut out the silk. Oh did it have some movement in it, thankfully with Angie’s help I got it cut out. What was really surprising was the sleeve cuff which is cut on the bias. When I took this off to cut the 2nd lot, the way the fabric expanded was rather terrifying. Angie advised me that I need to cut out the cuff interfacing from the pattern and then get the fabric to fit it!!

I did quite a bit of hand basting with this blouse to make sure that it didn’t move when I sewed the seams. I used a silk Gutterman thread for the basting as this won’t leave press marks in your fabric.

Angie showed us a number of seam finishes and I chose to use a normal seam as the french seam was too thick.

You sew your seam normally and then press to one side and sew a small zigzag (L1, W2) right next to your original stitching and them trim back to the zigzag.

I don’t have a button stash, so I called into Spotlight on the way home yesterday and purchased these buttons.

and plan to drop my blouse and buttons at Mick’s on the way to work tomorrow for him to do the buttonholes for me.

Here is the blouse completed as far as I am going to work on it.

It will make its debut during Me-Made-June.

Marfy 2254

Time has certainly flown by since I last posted and even though I have been very busy, I have very little to show.

I finished this blouse at the end of June and it has taken me this long to get photos.

This is my very first Marfy pattern, so I was interested to see what adjustments I would need for their patterns as I love the designs they come up with.

As I said in my earlier post, when I had the fitting session with Alison I had my normal adjustments done, which are:

Back

  • Round shoulder – 1.5cm added
  • High round back – 1cm added

Front

  • Round shoulder – 1.5cm removed
  • 1.5cm gaposis taken from the front neck edge

I explained to Alison that I had been having major difficulties with woven sleeves, and this was the fitting issue I really wanted to work on. Alison explained that a lot of the patterns now have lower armholes and the cap height doesn’t suit everyone.

Alison then measured my bicep (27cm), and with the tape measure still around my bicep she measured from the top of the tape measure to my shoulder point which is the cap height (11cm).

Here is the Marfy pattern with the pattern tissue measurements, which showed the cap height on the pattern was 15.5cm, so Alison got me to add 1cm to the sleeve and blouse armholes before she looked at any other adjustments.

Alison then got me to do the following adjustments:

Back


• Take out the High round back and replace it with a 8mm gaposis from the back neck edge
• Added 1.5 cm at the centre back neckline, take back to nothing at the shoulder seam
• Added 1cm to armhole
• Added 2.5cm at side seam tapering back to the normal seam towards the armhole

Front

• Added 1cm to armhole
• Added 2.5cm at side seam tapering up to zero towards the armhole
• Shortened the dart by 7.5cm

Sleeve


• Added 1cm to the side seams to match the armholes on the bodice
• Bicep adjustment of 2cm

Here is the completed blouse at the end of a days work:

Front

Back

Notes for next time:

  • I have managed to put one of the sleeves in wrong, it needs to be rotated back by 2cm.
  • The cuff is too tight where the sleeve joins it, so I will straighten the sleeve side seams a bit each side and add the extra to the cuff as well.
  • You can see a slight ridge near the neckline of my blouse, this has been caused by the 1.5cm that was added to the back neck edge. This will be removed for future blouses.
  • I will probably make the back darts a bit deeper and add a small bust dart at the front.

I have some silk that I want to make this blouse up in and it will be a good Spring addition to my wardrobe.

Fitting Weekend

I’m back home after a fantastic 3 day weekend having patterns fitted by Alison, “The Sewing Lady” in Brisbane.

This was my birthday present from DS, a full day of fitting on the Saturday with Alison and then a general sewing/fine tune fitting on Monday morning.

This is how it worked, there were 3 attendees for the fitting day which included both DS and I (this was all day Saturday, a maximum of 4 attendees for these days and they get booked out well in advance) and I managed to get 3 patterns fitted:

Simplicity dress 2648, View A with sleeves.

Marfy blouse 2254 and Marfy skirt 2253 (the free patterns included in the Marfy 2010/11 Annual).

Sunday was sewing at DS’s home in the morning and then we met Alison at Sckafs, Indooroopilly to learn about what to look for when choosing fabrics, trims, interfacings, etc which gave me quite a few light bulb moments.

Monday was back at Alison’s for the morning session of general sewing with 4 attendees (maximum of 8) so we tweaked the dress, sorted out the blouse and the skirt is underway. I’ve still got a long way to go on the dress and skirt, but the blouse is closer to finishing so you will probably see it soon.

The reason so much was achieved was I had all the patterns with my normal adjustments done, taped and pinned together when we arrived on Saturday. Luckily only 2 people (me being one) were having patterns fitted that day which was fantastic. Alison fitted the paper patterns on me and I made the additional changes to the paper patterns, then DS (my birthday slave) cut out my fabric, pinned up the fabric toile for the next fit and then she got into the actual sewing of the garments, this was at the classes and at her home. I also managed to contribute to the sewing on Saturday night and Sunday morning.

This was a fantastic birthday present and one I will remember each time I wear one of the above garments.

I will share more information on each of the patterns as they are completed so until next time …