SWAP is completed!!

Yes I know on Sunday I said I still had 3 pieces to make, welllll

  • I only had to finish the hand stitching on this sequin top for my Evening collection (9th piece) and that has been done.
  • I had already decided to bring in a previously sewn garment as per the rules, this black wool skirt  for my Evening collection (10th piece).
  • then the only piece left was the all important cross-over piece, the Trench.

    After a semi frustrating day sewing the Trench at my Guild meeting last Saturday where I did more unpicking than sewing, I sat down on Sunday night and listed what was left to do on the Trench. 

    There are still 18 steps left to do and one of these is working out how am I going to install a metal zip into the curved collar for the hood.

    I really want to finish this Trench with care and attention to detail and I realised I was not doing this by trying to finish it for SWAP.

  • Therefore I needed a new cross-over piece, so I have gone to the other extreme in difficulty and made another version of Simplicity 2603 the waterfall cardigan as my previous version needs to be retired.

I will be back shortly with more details for the sequin top and the cardi wrap, but thought I’d leave you with this:

Sorry, got to investigate that noise!

Lining a Skirt

dlogan asked a few posts ago how I lined my Vogue 7937 skirt, so here is the way I  was shown by Roberta Thompson (who wrote many articles for Australian Stitches) many years ago when she held sewing classes here in Sydney.

Fashion Fabric – Black wool
Lining – Charcoal Sun Silky

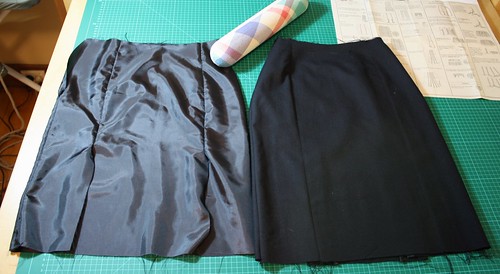
Cut out my fashion fabric.

Cut out the lining using exactly the same pattern pieces I used for the fashion fabric except I fold back the vent pieces as these are cut off when I do the lining hem.

The fashion fabric is sewn together as per the pattern excluding the waistband/facing. 
The lining is sewn together leaving the right hand side open for the zip, opposite to the fashion fabric zip opening (you will see why later). 

Now you have two skirts, one in your fashion fabric and one in lining. 

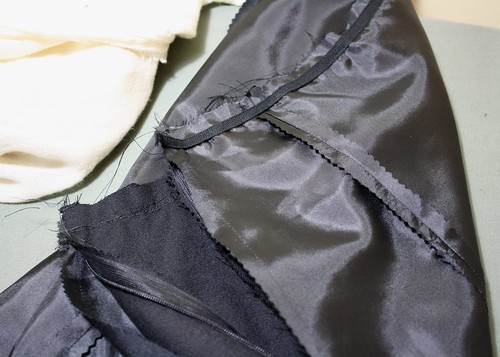
Pin the two skirts together at the waist, right sides together.

I then baste this seam together so nothing can move.

I am not a fan of facings on my skirts, so I use cotton twill tape* as my waistband/facing stabiliser. I don’t cut the twill tape to any length, I just have it on my lap and place it under the machine foot and start it off for the final waistband stitching.  Whilst sewing you pull the twill tape slightly so there is some tension on the tape sewing it along the 1.5cm/5.8″ seam line. This then helps the waist cup to my body.

Turn the lining to the inside of the skirt and I then stitch using my 1/4inch foot and 3.0 stitch length on my Janome MC 3500 on the right side of the skirt along the edge of the waistband.

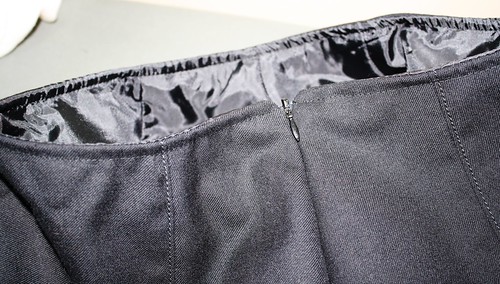
As I am not level, I have the assistance from my darling husband to level the skirt and then I prepare the hems:

Fashion Fabric

  • Press the hem edge, making sure not to press a pin head. 
  • Open up the hem and trim the excess fabric so that I have a hem width of 3cm/1 1/8″.
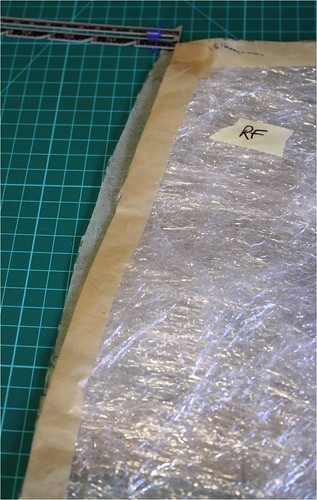
  • I fuse a 4cm/1 1/2″ wide (1cm/3/8″ wider then the hem width) strip of Textureweft (pinked along the top edge**) along the hem fold line (I do not fuse the strip over any seam allowances) to give the hem some body and this gives you a great base for doing your Herringbone stitch for the hem.   
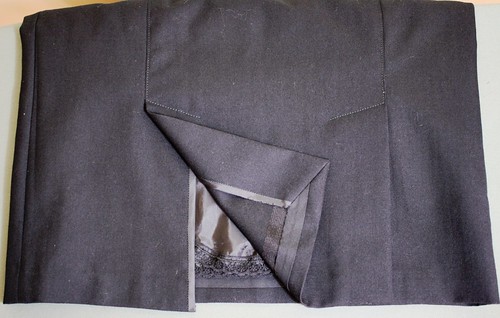
  • I also mitre the hem/vent corners on the fashion fabric.
Lining

For the skirt lining I cut this to be shorter than the fashion fabric by 2.5cm/1″ *** all the way around, disregarding the extra fabric at the vents.

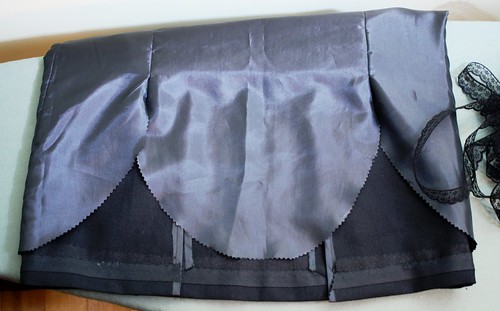
Once I have shortened the skirt lining, I then work on the fabric around the vents.

  • From the corner of each vent I measure in 6cm/2.4″ and put a chalk mark.
  • Then using my French Ruler I draw a curve like this from the vent edge to the hem edge.
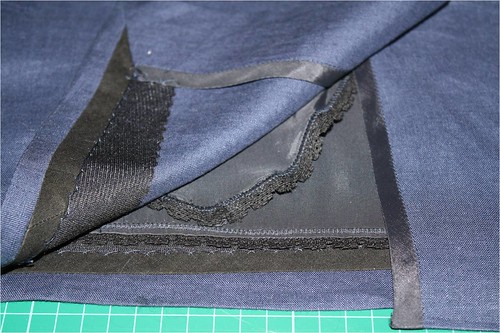
    • Cut away the excess lining fabric and this is how the inside of the skirt looks around the vents.

    • Finish off your lining hem as you wish.

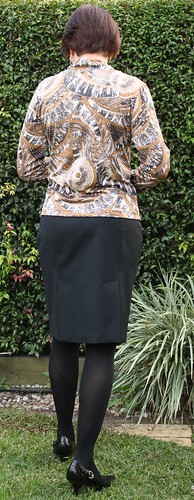
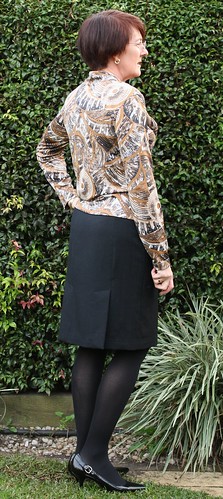
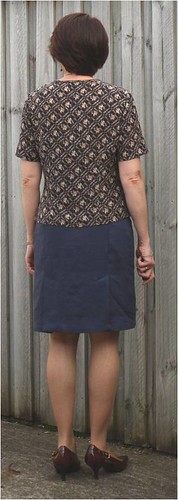
      Here is the finished skirt!

      Centre back vent showing mitred corners and Hong Kong finishes

      * I pre-shrink the cotton twill tape.

      **I have a bag full of these strips already cut on hand.

      *** Another thing I like to do is to add lace to the lining hem.  So this doesn’t show I cut the lining to be shorter than the fashion fabric by the lace width + 2.5cm/1″ e.g. my lace for this skirt is 2cm/7/8″ so I cut my lining hem shorter by 4.5cm/1 7/8″. I do like having a little hidden secret that only gets to be seen if the wind decides to play with my skirt.

      Vogue 7937 navy linen skirt

      is finished.

      Even though I have made this skirt a number of times before, although not blogged about, I have been trying to get the skirt to sit at my waist with no luck, it keeps sitting on my hips which isn’t what I wanted.

      Saran Wrap to my rescue!  Even though I have Isabel (my body double) my hip shape has been elusive when fitting my skirts. So I placed the Right Front lower half of my Saran Wrap on my pattern and look at the difference, no wonder my skirts kept sliding down to my hips.

      I pinned this amount out for this skirt to make sure I hadn’t gone too far, and it worked, my skirt sat on my waist all day long, so my pattern will be adjusted permanently by this amount.

      Here is the finished skirt:

      Front view

      See the Back Vent
      Back view

      A few extra details for this skirt:

      • Topstitched both sides of the front and back panels with Gutterman 310 Topstitch thread,
      • Finished the back vents with Hong Kong finishes.
      • Added black lace to the lining.
      • Added 15mm bias tape to the hem edge (now the skirt is on my waist I need to add some length to the pattern).
      • Fused a 4cm wide strip of Textureweft (pinked along the top edge) along the hem fold line to give the hem some body and a great base for doing Herringbone stitch for the hem.

      This is my 5th garment for the SWAP and the 6th is giving me some challenges with the buttonhole, but soon …

      June Capsule Contest 2008

      I did it!!!
      I have been visiting the Stitchers Guild blog for some time now and one of the ladies suggested a “June Capsule Contest” for those that hadn’t completed the 2008 Timmel Swap, or those lurking to join in, so I decided to join in and see how I went. I had always thought about the Timmel Swap however the number of pieces was just too daunting.

      The contest rules were:

      • 4 garments and 1 accessory
      • No black
      • There must be at least one top and one bottom
      • All items must co-ordinate
      • One item can be made before June
      • One item can be purchased

      Here is what I planned to make and the accessory hadn’t been finalised at this stage.

      I really procrastinated for the first two weeks, not a good sign and then started on the Oyster Chamois shell top just before the “Roberta Girls” headed to Ferndale for a weekend of sewing and good food.

      On the weekend at Ferndale I managed to sew the Brown Wool Crepe Skirt, including the lining up to hemming stage. I then put the sleeves into the Oyster Chamois and this didn’t look good, pulling around the armholes which I didn’t know how to fix so instead of wasting my time I decided to put this on hold and get on with it. I started the Coffee Knit top and had this well underway by the time we left on the Sunday afternoon.

      One of Alison’s friends Susan joined us for the weekend and she does some lovely beading. I showed her my fabrics and this is what she designed/made for me:
      I am absolutely thrilled with it. This is officially my purchased item and my accessory.
      It is now the 23rd of June and not one items is finished!! The shell tops don’t look like they will be made as there are some fitting issues that I can’t quite work out by myeslf.
      I finished the skirt and lining hems during that week.
      On Saturday (28 June) the Rhodes Fashion Sewers (ASG group at Rhodes) had invited Angie Zimmerman to join us to work on our pants. Luckily Angie had some time to help with me with the shell top fitting issues and the oyster shell top was back on track.
      Unfortunately domestics took over on Sunday so on Monday 30 June as soon as I arrived home I locked myself in the sewing room as I was determined to finish. The oyster shell top had the side zip to be put in, sleeves and hems. DH regularly bought in the chocolate and tea to keep me going.
      As I didn’t make the 2nd Shell Top, I was very thankful for the rules allowing a “made before June item” so I substituted this with the Channel Style Jacket that I made earlier. This co-ordinated with all of my pieces so worked a treat.
      Now here is the completed ensemble: “Brown is my Thing”


      Top:Coffee Knit tee from Kwik Sew 3378 view A.

      This was made from fabric purchased in January this year from my local sewing shop. I am wearing a purchased cami underneath.

      Skirt:
      Brown Wool Crepe from Vogue 7937 view A-B without the belt loops.

      This was made from fabric that I purchased from Lincraft and has been maturing in my stash.
      The pattern is not lined, however I always line all my garments and then attach lace to the hem for the finishing touch. The back of the skirt has back vents which I have used Hong Kong finishes on the self facings and extensions of the skirt (shown above).

      Jacket – Made before June
      Brown, blue and green Tweed Jacket from Vogue 7975 view A.

      I made some minor changes to the sewing of this jacket e.g. I sewed the tape on the front of the jacket before finishing off the neck or hem edges (I had sewn the jacket front and facing together, trimmed and under stitched so I had an edge to line the tape up to). I didn’t use the ribbon as the closure, I sewed 6 large black hooks and eyes on the jacket so I could close it. The photo doesn’t show the colours in the jacket very well, this is much better

      Worn with the Top and Skirt from above.

      Shell TopOyster Chamois top from Vogue 8572 (OOP) view C.

      This was made from fabric purchased from Martin & Savage the fabric suppliers here in Sydney on an Industry Day with the ASG 3 years ago.

      I made some adjustments to the pattern, creating fitting darts both front and back, bust dart and an invisible zipper in the side seam to enable me to get the top on/off.

      Worn with the Skirt and the Jacket is draped over my shoulder.

      I’m so thrilled to have completed the 3 garments in such as short time as my sewing is usually a lot slower than this.