Vale Roscoe

This is so hard to write.

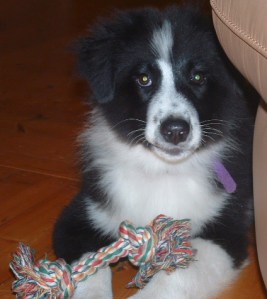
Over the years my long term readers have come to know my beautiful boy Roscoe.

He came into our lives as a 9 week old pup, our fur baby in January 2004.

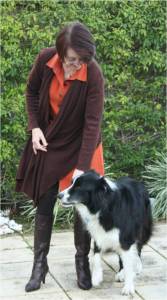
Since then he has been my constant companion, always by my side, we have trained together and even drove around Sydney doing Agility training which he still loved to do at our local Off Leash Area

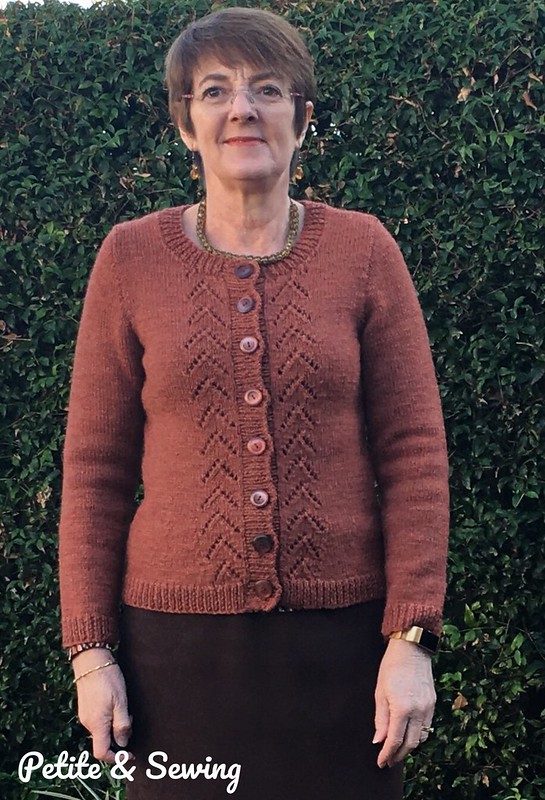
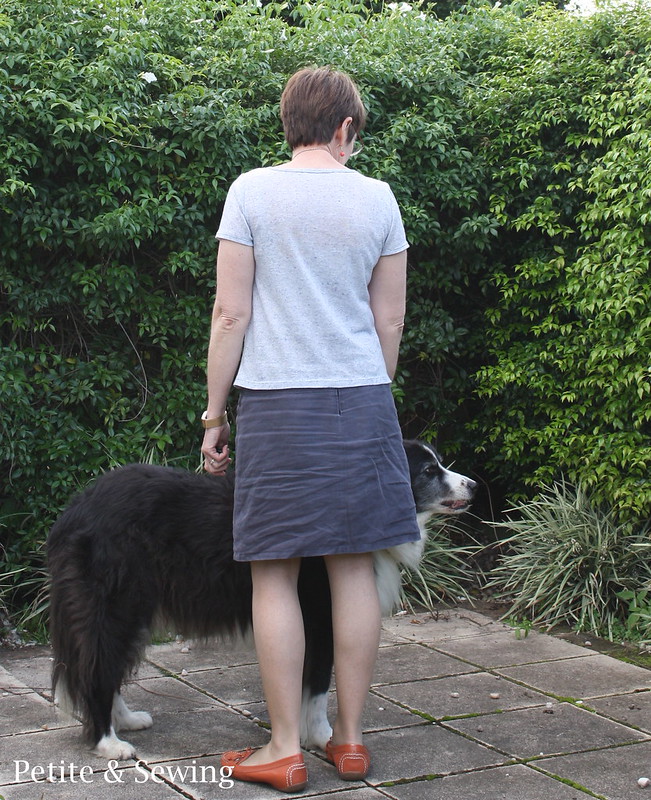
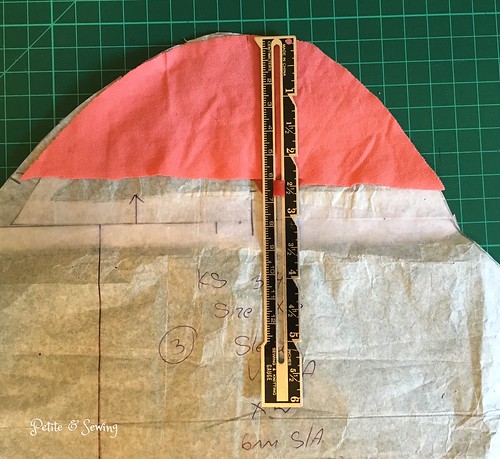
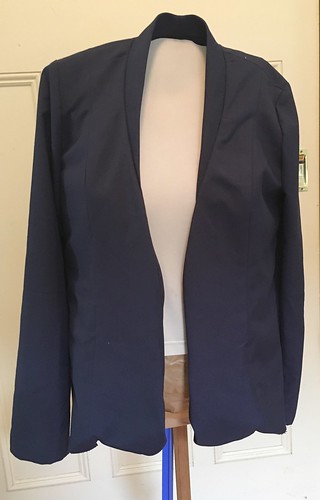
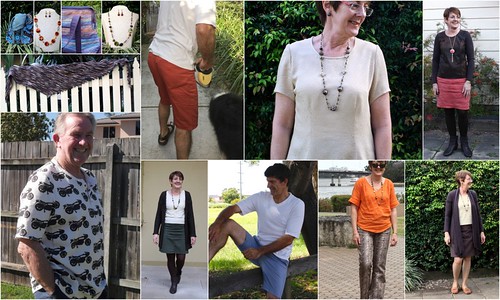
Roscoe was very accustomed to seeing me taking photos for my blog in the backyard for many years and then for some reason at 6 years of age he decided it was time for him to be included where he managed to be in a lot of my photos from then on.

Our mornings started with the alarm going off and then being bombarded by Roscoe until we got out of bed to go for our morning walk. This was the first part of a morning ritual, breakfast and coffee (frothed milk) with a possible yogurt container to lick and play with were just the mornings. Around 5pm or when we got home another walk and play time was had before dinner and then cuddles until we all went to bed.

He loved catching ball, playing soccer, chasing and catching the Frisbee and of course, a stick was always a great play toy.

One of the treats Roscoe really enjoyed was a trip to the beach playing in the surf and rolling in the sand.

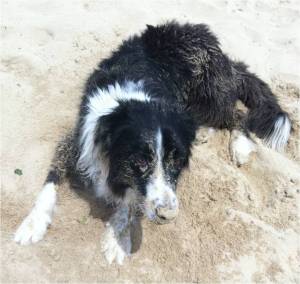
Last Christmas we realised Roscoe had lost a lot of strength in his back legs when he wasn’t interested in playing in the surf or even capable of having a good roll in the sand.  He had also developed some breathing difficulties.

Last week it all came to a head, Roscoe struggled to walk even half a block without rushing home very distressed. A trip to the vet confirmed our worst fears and we had to say goodbye.He will be missed!

Me Made May 2017 – Another Year

has passed and I do find that May does make me look at my wardrobe in a different way, not just grab the combinations I am familiar with, but to try and change them up and wear garment combinations that I haven’t or don’t normally wear.

One of the garments that I was very pleased to wear was my couture dress which was finished to wear on Day 5 but at this stage that is the only photo I have managed to get so I promise a lot more information and photos will appear.

An item that Jean from Sew Jean Margaret talked about were her merino layers and as a cold frog this is something that I need to look into further.  In fact I know I have the pale coloured merino in the stash and my TNT knit t-shirt will be the perfect base.

Once again May has highlighted that I need more tops, either to replace those that are finally getting too old or plain tops so I can wear my denim jacket and those two jackets from Dilliander which now the weather is getting colder will certainly come in handy.

In part I did get 3 tops made in May, one striped and two plain so I am on my way to fixing the top issue.

Finally if you would like to see any of the photos in more detail, here is a link to my Flicker album and I also now have in instagram account petitieandsewing  where I posted my daily outfits.

Charlie’s Cardigan

I am so happy with my new cardigan for a couple of reasons.

Firstly I found out about Amy Herzog a few years ago over at Stitcher’s Guild and have since purchased her 3 books as well as her Craftsy classes.

As soon as I started to read and listen to Amy I loved the way she spoke about Fabric, body shapes and styles to suit your body all based on your knitting.  In fact Franklin Habit from Mason-Dixon Knitting wrote a great post about Amy’s 3 books.

Now I struggle with maths, whether it is drafting a pattern or working out how to increase or decrease my stitches for my knitting it just gets me so flustered that I choose not to do it.

This is where Amy’s CustomFit has come to my rescue.

There are a number of steps, in no particular order.

Essentially you and a friend take all your measurements, which I found to be more comprehensive than what I have previously done for sewing.  The measurement are entered into the CustomFit site (once you have joined).

Then you decided on what wool you want to use, yes you can choose any wool, linen, cotton that you have and that you want to knit a garment with.  You knit a swatch of at least 30 stithces by 15 cm (6 inches) and work out your stitch and row gauge and then this information is entered into CustomFit.

Thankfully my knitting stash is not as large as my fabric stash but I had purchased this Bendigo Woollen Mills 8ply Rustic in Sienna back in May 2015 and decided to use this for my first CustomfFit cardigan.

Here is my 3rd swatch, I wanted fabric that I liked the feel of and it was achieved with 4.75mm needles.

Amy Herzog has a huge amount of information on swatching

Next you choose a pattern, add your swatch information and then your measurements are combined and you have a pattern made just for you.

My pattern page.

You are not limited to the Customfit patterns, there is a whole board over at Ravelry on how to Customfit non CustomFit sweaters.

The other reason I am so happy with this cardigan is as you know I have changed my knitting style to Continental and was completely blown away that I could knit this cardigan in 7 weeks!!  Normally it takes me at least a year to knit the pieces!

But then it did take me another 7 months to finish it as life got in the way and this was my first button band and then summer was upon us.  I finally got motivated to do the neckband and button bands which I also stablised with Panda Petersham purchased from Torb & Reiner in Melbourne.

and it was finally ready for the cooling weather.

The only change I know I need to make to my measurements is the sleeve length for long sleeves, these could be longer but are quite wearable as they are.

Expect to see a lot more CustomFit knitting!

V8648 – The Coutre Dress progress

is very slow, especially when you have been laid up with influenza for the last 6 weeks.

Our first day started with Susan Khalje discussing with the group what we were going to make and what fabric we were going to use.  I had purchased some wool crepe for my dress, but found in my stash some wool with a twill texture which I also took along as it was larger piece.   The class nominated I use this fabric which I was happy to do as I had now decided I wanted sleeves.

Next up Susan had us putting on our toiles and doing the first round of adjustments.  Thankfully my 4th toile was pretty good but still some minor tweaks were made.

These are then marked in another colour marker on your calico and the seams are then unpicked and the pieces ironed flat.

Everything is then laid out on your silk organza and cut out, then this is laid on top of your fashion fabric and you are ready to start hand basting each piece together.

For the next fitting, I used every pin I had and felt like an Echidna whilst Susan did the next round of tweaking.

Then it was more thread tracing of the adjustments and sitting down at the sewing machine and sewing it all up.

The midriff panel gave me some grief and you can see below the different adjustments I had to do to it.

By the time I left the class 6 days later, I had:

  • the dress bodice, midriff and skirt all sewn together.
  • hand picked the centre back zip.
  • the right sleeve was basted in place, and the left sleeve was waiting it’s turn.

There is still a lot of work to do, I only finished the catchstitching of all the seam allowances over the Easter break and I am now in the process of making sure all the adjustments are on the pattern pieces so I can cut out the lining.

More to follow.

Navy linen t-shirt

There is not much to tell about this new t-shirt except that I made it back in February as I was in desperate need for new summer tops.

Using my TNT t-shirt pattern KS 3740 this was a very quick make with the linen knit I purchased in Cairns in July last year.

One of the things I did differently was to use my Juki overlocker to sew the tape into the shoulder seams as I had never done this before.

I also used the binder on my Coverstitch to add the neckband but I forgot to take a photo.

The rest of the top came together quite quickly and after I had glued the hems in place I used my Coverstitch to sew the hems.

This is how I wore it to my ASG meeting at The Remnant Warehouse today,

and Roscoe was very happy to see me home and was demanding a pat.

******************
2017 Stash Out: 3.3 m
2017 Stash In: 4 m

V8648 -The Couture Dress with Susan Khalje

Wow February was an exhausting month and the dress isn’t finished but I thought I’d share my preparation for this course.

In our detailed pre-class notes Susan asked us to bring to class “a fitted muslin/toile” and as I shared my plans for this course I did have my 4th toile ready for Susan to fit on our first day of class.

The reason for the 4 toiles is that all of my sewing of late has been using TNT patterns so it has been a very long time since I have tried to get a pattern to fit me.

Therefore this is a very long post about pattern adjustments.

1st Toile

In preparation for my first fitting with Anita from Studio Faro I started with size 6 using my high bust measurement as the starting point.

Then I did the following adjustments:

  • FBA of 2cm
  • Raised the hips by 5cm
  • Raised back neckline by 9.5cm
  • Added 0.5cm to each of the seams of the skirt and back to zero at the bodice.

My first fitting with Anita was on 4 December 2016 and as you can see the bodice was snug so Anita suggested I add 0.5cm to every vertical seam on the dress so this makes me wonder if I should have started with the size 8 but then those vertical seams did not affect the shoulders.

2nd Toile

So the width was added to all the vertical seams for my 2nd visit with Anita on 8 January 2017 and Anita marked the following adjustments:

Bodice

  • Took 1cm out of the width of the centre front bodice
  • Smoothed out the bust curve by 7mm
  • Took a tuck from the bodice side front side seams of 11mm to nothing at the bust curve
  • Took a tuck of 7mm above the bust on bodice side fronts
  • Dropped armhole by 1cm
  • Bodice back side took 7mm tuck right across 

Midriff pieces

  • Added 3mm at waist edge of Midriff Front and Midriff Side Front taking to zero at bodice edge
  • Took 1cm from bodice edge of Midriff front to zero at waist seam

Sleeves


  • Biceps adjustment on sleeve back of 1.5cm at hem edge using Fit For Real People on page 171 
  • Added 9mm at back side and front side seams
  • Added 6mm to sleeve centre seam starting at the sleeve hem taking taking back to zero level at the underarm for both front and back patterns pieces
  • Shortened the sleeve 3.2cm
  • Dropped the armhole by 1cm 
Skirt

  • Added 3mm on the front and side front seams from the waist back to zero 13.5cm below
  • Took off 1.5 cm from the front centre back to 1cm at side seam
  • Took off 1cm at side back skirt to zero at side seam

3rd Toile

At my final fitting on 22 January 2017 Anita took a further 0.6cm from the centre front bodice,


and for both the bodice side front and back, reshaped the armsyce and adjusted the shoulder seams.

V8648 Bodice Side Back

4th Toile

Finally my 4th toile was ready for my fitting with Susan Khalje on 6 February 2017.

More to follow.

Coral necklace

There are a few coral outfits appearing in my wardrobe and I decided I needed a different style of necklace for them, so I headed back to Zilchbeads and found another inspiring spiral necklace using long Magatama 4x7mm beads, together with size 8 and 11 seed beads.

Photo from https://www.etsy.com/market/rainbow_rose_seeds

The beads are quite cute, and I was told that one way they looked like a “boot” and the other way a “shoe” so when stringing you have to make sure that they are all facing the same way.  I chose the “shoe” orientation,

and I had fun making the earrings using both orientations,

and here is the full set!

They are getting quite a bit of wear this summer with my cold shoulder top and my watermelon frilled top.

Cold Shoulder Top

Back in December during my first lot of toile preparation for Susan Khalje’s classes I decided to make myself a new top for summer.

To start with I pulled out my TNT knit pattern, KS 3740 and then thought I would add the cowl from the ASG Cowl Neck Knit Top Sew-along, so I traced of a new pattern and followed the great instructions and had a new front pattern.

Then I dug out this fuchsia knit that I had purchased at The Remnant Warehouse that worked with this skirt that is an orphan in my wardrobe now that the knitted top no longer fits.

I merrily cut out my top, stitched the shoulders and overlocked the side seams and tried it on!

Did you notice above the words “no longer fits”, well it was a complete disaster, partly due to the fact that I have gained some centimetres and the stretch of the knit wasn’t what I thought it would be.  The top has now had its side seams unpicked and I am trying to work out a way to salvage it.

However I was determined that I would have a new top by the end of the year!

Back to the drawing board, this time I pulled out some Coral Cotton Knit that I purchased from Pitt Trading back in 2015.

First I checked the amount of stretch and it was better than the fuchsia knit, so I went ahead and cut out and sewed another top but this time I only basted the side seams before I tried it on.  A bit snug but wearable so the sleeves were basted in.

Looking in the mirror it was very apparent that I hadn’t made the forward shoulder adjustment to my knit TNT pattern, and with the knit being rather thin it was really noticeable.

It took me a few days and then it dawned on me, what about a cold shoulder top!

I undid the top of the sleeve and then put it on, turning down what I thought looked good, pinned in it place and then took the sleeves out, stitching the new top hems on my coverstitch and then trimming the seam.

I hemmed the sleeves and then stitched the sleeves back into the armholes.  I added Lite Steam-A-Seam2 to the remainder of the armsyce

turned it under and coverstitched it in place.

After a few washes

Back to the sleeve pattern, I pinned what I had cut off and it was 6cm.  So for the next version I will create a new pattern and straighten the curve at the top 1cm of the sleeve so that I when I turn it to hem there is solid fabric all the way across.

The back view

******************
2017 Stash Out: 1 m
2017 Stash In: 4 m

Susan Khalje Couture Sewing School in Australia

I was so excited to find out that Susan Khalje was coming to Australia from the Australian Sewing Guild and you my have seen Kristy talk about it as well.

During her 2017 Australian Teaching School she is offering:

  • 7 day Classic French Jacket sewing class
  • 6 day Couture Sewing school
  • 3 day Guipure Lace skirt class
  • 2 day Couture Techniques class

I have always wanted to attend the Classic French Jacket class especially after reading about it on Melanie’s blog and I had planned on heading to Baltimore sometime in 2017.

So February is going to be a busy month for me as I have enrolled in 3 of the classes;

  • Classic French Jacket, 
  • Couture Sewing school, and 
  • Couture Techniques class.

Kristy also pointed out that Bewitched is having a closing down sale and I made a bee line for there a few weeks ago and found some ink navy wool crepe for the dress I am planning and a wonderful tweed for my jacket.

The Couture Sewing school had me thinking hard on what to do for this as we are not people who go to balls, or fancy dinners and I don’t have that very special birthday coming up soon either.  Then I remembered I had Susan’s Crafty Class – The Couture Dress using V8468 and after seeing the amount of different looks this pattern can achieve, I have decided to use this pattern for this class.

For the Classic French Jacket class I have decided to use Susan Khalje’s pattern –  The Classic French Jacket.

I have been working on my toiles for the last 2 months during my limited sewing time and have attended two Sunday afternoon classes with Anita from Studio Faro who has worked so hard with me to fine tune the fit of both garments.  Still one more round to go, but now I am more comfortable with the fit for when I meet Susan.

******************
2016 Stash Out: 0 m
2016 Stash In: 4 m

2016 in Review

I am definitely late to the party this year,  but I do like to look at what I managed to achieve each year.

Gillian has again encouraged us to look at our Top 5 Hits, Misses, Highlights, Reflections and Goals for 2016.

Hits

Reptilian jeans, I love them.

Pleather top, I am so pleased how this worked out.

My BIL’s Ducati Henley, I thoroughly enjoyed the process and how well it turned out in the end.

Misses

The rayon shell top is a fail, I do not like how it works with the top I made, probably wrong fabric choice.

The biggest fail and the one that completely took away my sewing mojo for quite a bit of the year was Burda 7286 Jacket, wrong fabric, gaberdine weave doesn’t work with tailoring!!

Highlights

  • I’ve travelled a lot this year, Armidale, Brisbane as well as Puyallup where I met Carolyn and Patti.
  • Attended 2 sewing weekends with my sewing buddies.

Reflections

It was an interesting year last year, I seriously took up Continental knitting and am enjoying it immensely, there is a cardigan that just needs the buttons sewn on and it fits perfectly.

The bags I have made have filled a hole in my life both for travel and also at home.

My addiction to fabric has not been cured or curtailed, unfortunately more came in 42.95 than last year and less went out 20.1.  This does not include the bags.

Goals

I managed to complete 2 of my goals for 2016:

  1. Picking (Continental) knitting. 
  2. Entered the bag contest at Pattern Review.
I am carrying the other 2 across to 2017 as they are still projects that I want to complete e.g.
  • Pants
  • Lingerie
Finally, I would like to thank everyone who visits my blog, takes the time to comment and share my sewing, knitting and jewellery making journey with me.

Now for the collage of my makes for 2016.