Me Made May 2016 – It’s a wrap

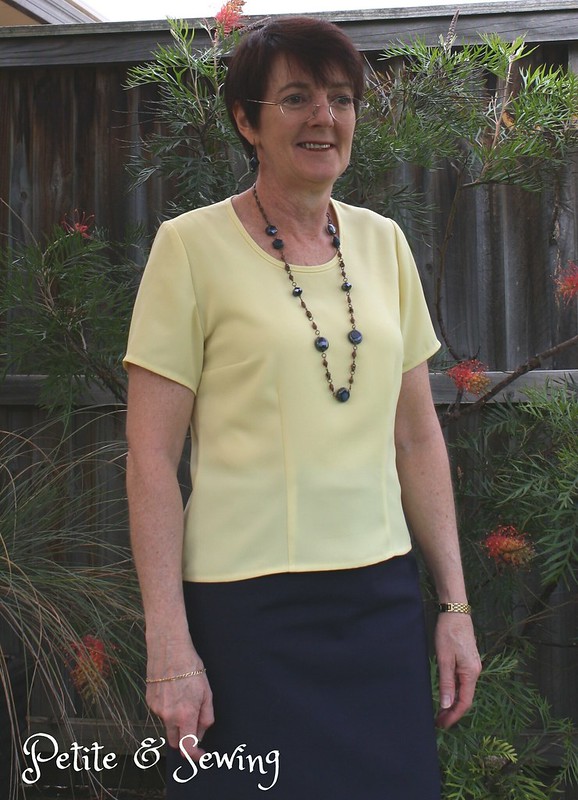
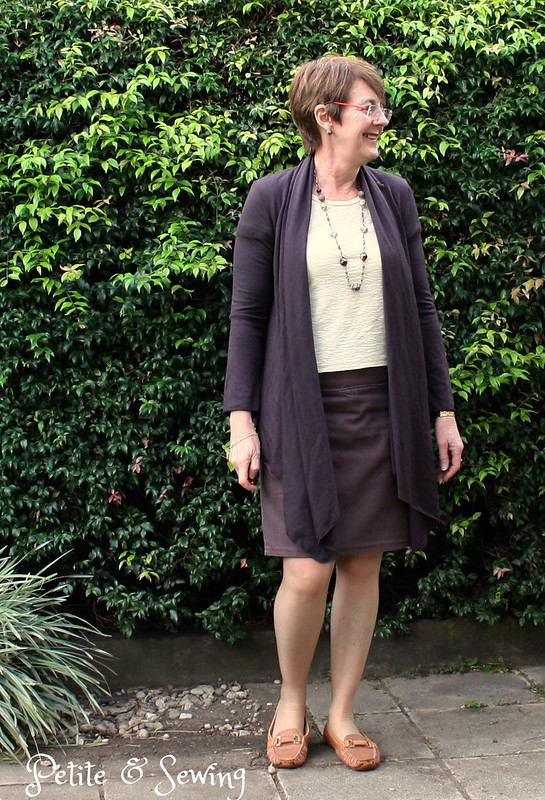
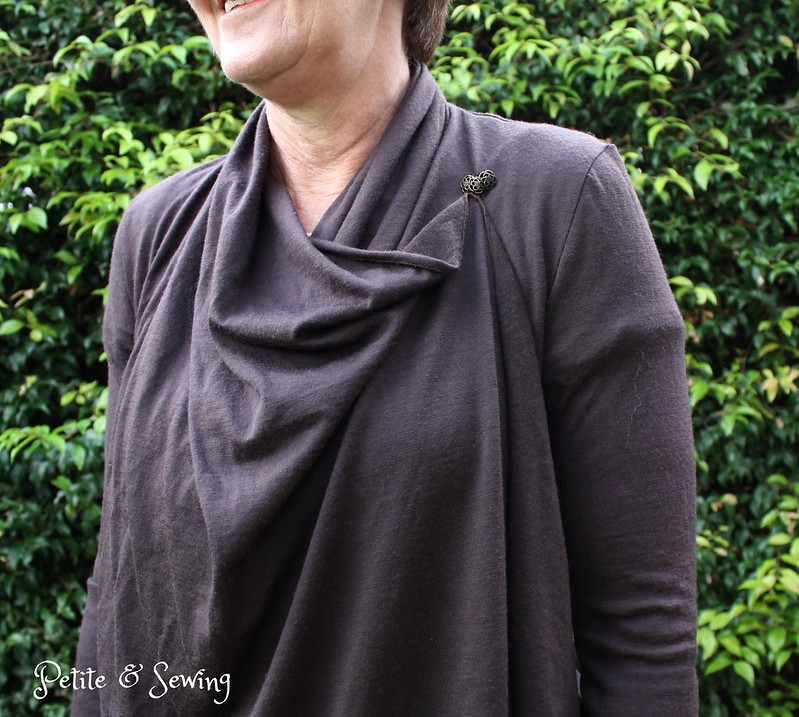
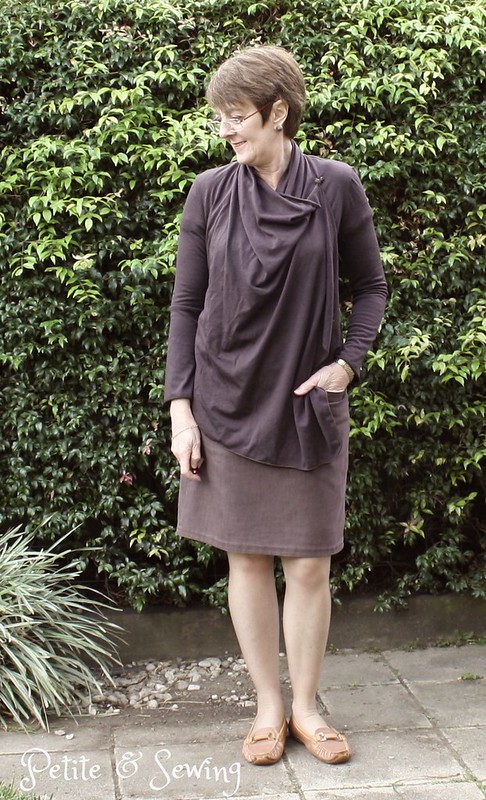
This May has been rather challenging for my wardrobe as the first 3 weeks were a lot warmer than usual and this is where I realised again that I need cardigans as the two I have were in high rotation.

This year I decided not to clutter up my blog with daily or weekly posts and the collage below is what I have worn during May.  This link will take you to my Flicker Album if you would like to see any of my outfits in more detail.

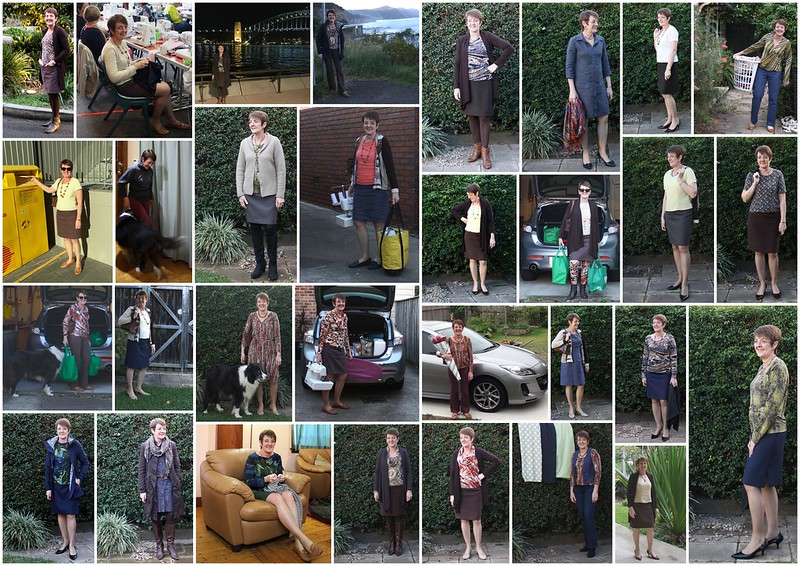
I know I don’t want a large wardrobe, so I am quite happy to see most of my garments being worn multiple times, my biggest challenge is to make the outfits look different when I am sitting at my desk at work.

There are still holes in my wardrobe and this is what I need to make:

  • I still need layers in my wardrobe and even though this comes to light every May I haven’t managed to rectify this.
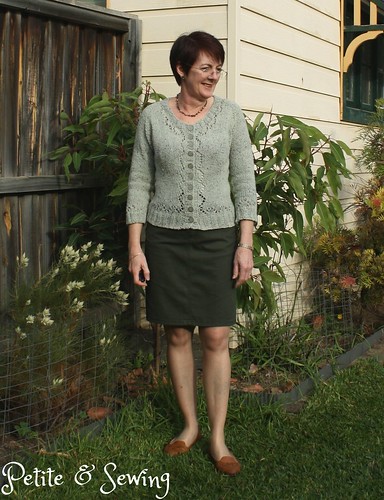
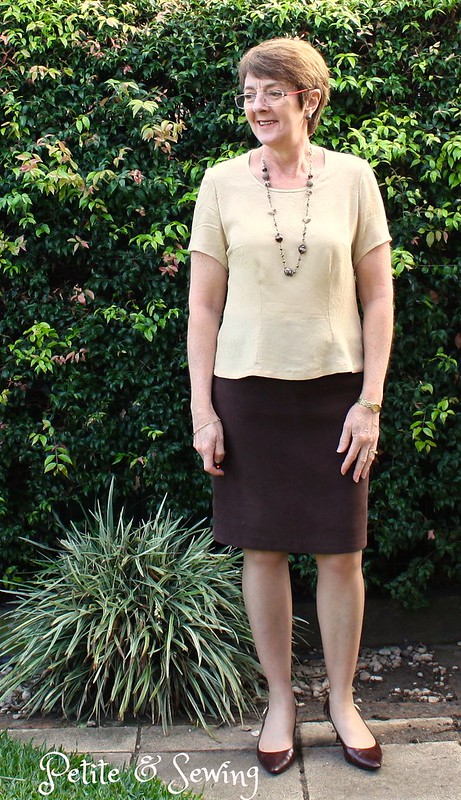
  • I only have 1 plain long sleeved top and this made it difficult to wear a couple of other items in my wardrobe when the weather finally got cooler.
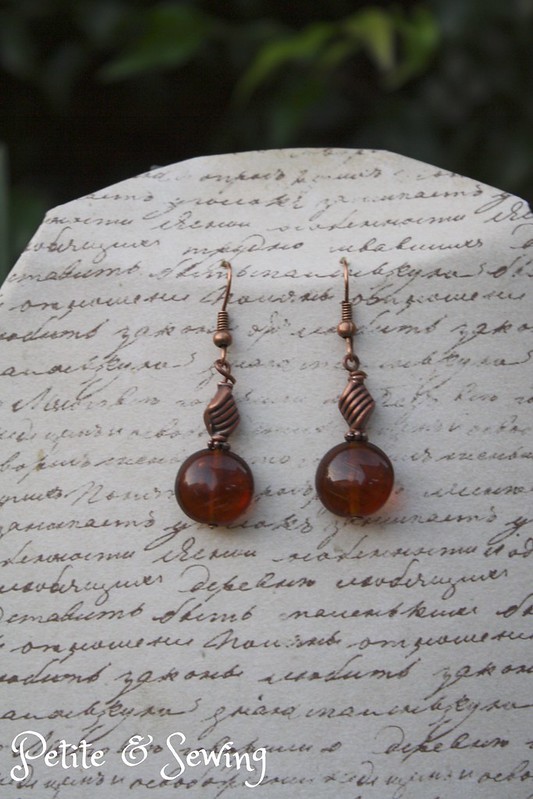
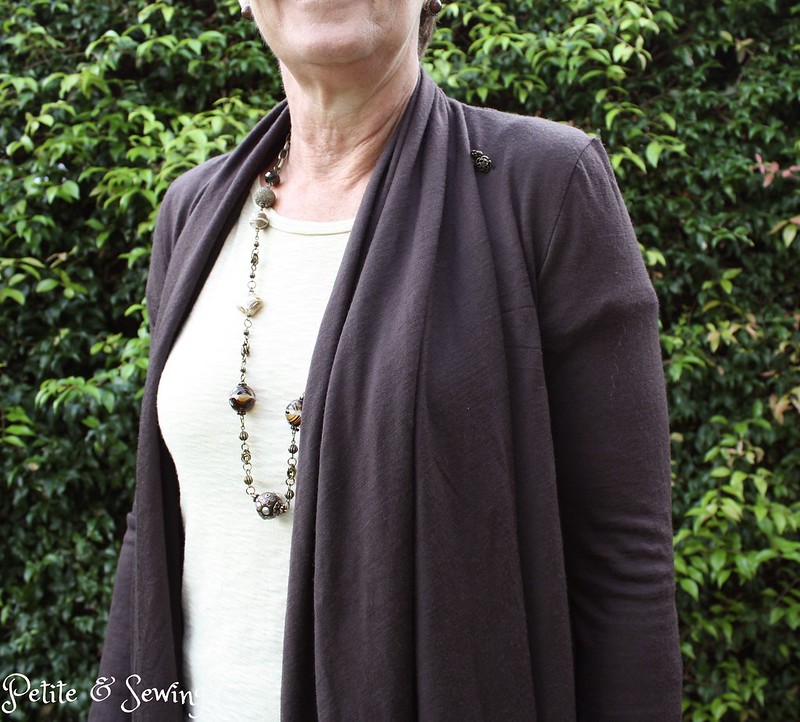
  • Some more necklaces.
So how did I go with my challenges for May 2016?
“I, Sharon from Petite & Sewing, sign up as a participant of Me-Made-May ’16;I will wear handmade clothing (except lingerie) for the duration of May.  My challenge is to finish the Burda wool jacket I started in January this year as well as lengthening the 3/4 sleeves on my Miette cardigan.”

Not 100% finished but both garments are looking like they will be worn this Winter so that is a plus and it means two more layers added to the wardrobe!
  • Burda 7286 has the hems, pick the buttons and buttonholes left to do.
  • My Miette has one long sleeve and the other one is halfway there.
I really liked seeing the variety in the MeMadeMay2016 Flicker group and there are a few things now on my wish list and that includes some cardigans!

DK-93 Manual Snap Press

Back in March I mentioned that I had received the DK-93 Manual Snap Press for Christmas after reading Lena’s blog.

Here is it set up on the workbench in the garage ready to be used,

and here are the dies I have acquired to use with it:

From GreenBeans Australia

*  DK-93 Size 20 Die Set, this is for the plastic snaps that GreenBeans Australia supplies.

*  10.5mm Nickel Ring Snap

*  12.0mm Nickel Ring snap

Then I ordered from Minkus Margo the following dies:

*  Hole Punch die mold

*  Jeans Button die

* 9mm Double Cap Rivet and 9.5mm Nipple Rivet

Then last month I got the chance to use my DK-93 press for a special birthday Henley I was making for my BIL.

I wanted to add some snaps to the placket and used the Snap Source Size 16 Smoke Open Prong Ring snap fasteners with the the DK-93 press and the Nickel 10.5mm Ring Snap.

Luckily I had found a great article in Sandra Betzina’s Power Sewing ToolBox Volume 1 on page 107 on how to get “Snap Success”.  Now this is for the Snap Source snap-setting tool however the same principles apply to my application.

I tried a few test samples first and soon realised that standing on the ground next to the DK-93 press wasn’t giving me a snap that that I couldn’t get my fingernail underneath.

So I searched the web and found that you need to put your whole weight on the arm of the DK-93 press, so I set up a small step ladder and found this set up gave me the perfect snap.

To mark where I wanted the male snaps to be placed I used a green Frixon pen, and then used a prong to mark the spot.

Then to line up the corresponding side of the snap, I rubbed some chalk on the socket and pressed it down onto the opposite side.

and the finished placket.

Now I need to decide if it will be a pair of jeans or a jeans style skirt next to test out some of the other dies.

Tribute to Tribal

I’ve found some more time to bead and realised the other necklace colour I was missing was yellow and orange and luckily my sister had given me a box of beads for Christmas 2013 which contained just the right beads called Tribute to Tribal.

For this necklace I thought I would let the beads do the talking and used links and small yellow beads to join the striped beads together and then added some antique spacers to break it up a bit.

and the earrings

This set really looks great with my lemon t-shirt and I do have some gorgeous orange merino jersey earmarked for a top.

Me-Made-May 2016!

Besides finding May has crept up on me, I have really struggled with whether I should join the Me-Made-May 2016 challenge this year, as I do wear my handmade clothes and jewellery the majority of the time.

So I have been trying to think of a challenge or two and have come up with the following pledge:-

“I, Sharon from Petite & Sewing, sign up as a participant of Me-Made-May ’16;I will wear handmade clothing (except lingerie) for the duration of May.  My challenge is to finish the Burda wool jacket I started in January this year as well as lengthening the 3/4 sleeves on my Miette cardigan.”

The jacket is the same jacket as Kristy has made, Burda 7286 and I took it to Camp Sew & Sew;in Armidale back in January to get fitting assistance as well as spending some time with some fantastic ladies.

Now my Miette cardigan has only been worn this once back in May 2014 when I noticed that the lace pattern at centre front was wrong!  So it has been frogged, and reknitted, however in my haste I forgot to lengthen the sleeves as 3/4 does not work with this warm wool, I need long sleeves.

last seen 2014

Both of these garments will be very useful as the weather cools down so this challenge is perfect.

Now to try and keep up with what is happening on the Flickr Group.

Spinach necklace

I have been reviewing my jewellery compared to my garments and realised that I didn’t have a long green necklace.

So during the long weekend I spent some time beading, again using one of the Jesse James Beads bead strands that I have purchased from Spotlight.

This bead strand is called “Spinach 1” and I forgot to take a photo but this is what the current “Spinach 1” looks like at JesseJamesBeads.com

I decided to try my hand again at Byzantine chains which I haven’t done since April 2012.

The good thing is that this necklace will work with all lot of garments in my wardrobe.

When I purchased the “Spinach 1” bead set I also purchased a pack of the same Inspiration Mix,

which included among them the two brown beads I used for the earrings.

There are a couple more necklaces I need for my wardrobe so now I need to find some more time to bead.

Taupe shell top

I found myself very short of summer tops for work this year, and the paisley rayon’s I purchased recently had been earmarked for this hole in my wardrobe.

The first one is using my TNT top pattern, Vogue 8752 (OOP) which I am still fine tuning as my body changes as the years go by.

 The last lot of changes happened after a workshop at our ASG group back in July last year about armscye/sleeves by Anita McAdam who owns Studio Faro.

Anita suggested we bring/wear a top/blouse that we wanted help with, so I chose to use my TNT top and wore this yellow top.

Over the  years I have made a number of adjustments and it was the cream silk version that I made the round shoulder adjustment to my sleeve pattern and I was pretty pleased with that but I still get some stress lines around the armscye.

Anita suggested I also needed a forward shoulder adjustment and I have gone about it as follows:

1.  On the sleeve pattern I folded out 1.2cm on the back armscye and added 1cm wedge to the front armscye.

2.  I then did the corresponding adjustments to the front and back pattern pieces.

Front

Back

I didn’t expect this fabric to fray like it did after I put the invisible zip in, so

I did a Hong Kong finish on the seam allowances

and then did French Seams for the shoulders and right side seam.

I told a sewing friend that I used bias strips of organza to insert my sleeves, so thought I would try and explain it here.

*  After doing French Seam on the sleeves, I

*  took a 4cm wide bias strip of organza and placed this on the wrong side of my sleeve cap, starting at the dot and lowered the needle, with my machine on baste stitch, I put pressure on the bias strip as I stitched it around to the other dot,

and when you finish your sleeve already has a very nice shape to the sleeve cap.

*  and you can also use the basting stitches to put in more ease or reduce as necessary.

*  once the sleeve is in place, I cut out the silk organza bias strip.

Then to finish off the sleeve I added a Hong Kong finish to this seam.

and here is the completed top.

I’m not sure what is happening to the sleeve, even though I took out a wedge from the back armscye, it looks like there is still too much fabric.

Oh and I forgot to shorten the back darts, that would have given me just that bit more room at the back.  The pattern is now noted for next time.

Now off to work.

******************
2016 Stash Out: 6.1 m
2016 Stash In: 15 m

Winter Cardigan

During my trip back home from Tamworth back in May last year, at one of our stops I managed to loose my Merino cardigan that I had made back in 2011.

This was a great piece that could be worn open or wrapped around me to add an extra layer when it was necessary.

So the next time the Fabric Store had a sale, I was there to purchase enough Merino wool to specifically make another cardigan.

It then took me to January this year to finally get around to making it for our trip overseas.

I again cut the front drape halfway between the short and long versions but what I didn’t take into account was the different drape of the merino wool.

Short sleeves aren’t a good look under the cardigan.

The drape was not quite as long, so I couldn’t flip it over my shoulder and the sleeves were rather snug.

Thankfully the back covered my hips which was good.

So I added 3 small metal buttons to the upper chest on the left hand side

and sewed a thread chain about halfway along the other drape

so I could create another layer

that looks like this.  The side of the drape with the buttons on it is tucked into the back waistband of my skirt.

Even though the sleeves are snug and this is quite obvious with a short sleeved top underneath, when I wore it with long sleeves there are no other lines on the sleeves.

This was worn nearly every day I was away, it works with all of my tops and provided the extra layer I needed.

******************
2016 Stash Out: 5.3 m
2016 Stash In:  15 m

New knitting bag

When I can’t sew I take my knitting and have been using a large knitting bag for many years.

Besides it looking very tired it was too large for my trip overseas so when Andi Satterlund from Untangling Knots posted about Knitting at Parties, she shared a link for the perfect little knitting bag.

The Reversible Sock Knitting Project Bag  by Very Shannon.

I have quite a bit of the Vera Bradley fabric in my “bag stash” and have used it previously making a Spice of Life bag which unfortunately stays in the cupboard.  I’ve realised that even though I love the fabric I will enjoy it a lot more making accessories for my knitting.

I have used both the large floral and added the large border to add some interest to the side of the bag.

For the lining I used the smaller patterned fabric.

I cut a strip of the large floral and used the smallest Fasturn tube to make the cord.

This was the perfect size bag for my trip.  I did take the cotton facecloth that I was knitting and a skein of wool as well as 2 pairs of interchangeable needles for my circular needles for the knitting class I did at the Sewing & Stitchery Expo

The facecloth is now finished and although not perfect I am feeling a lot more comfortable with the “continental style” of knitting.

******************
2016 Stash Out: 3.4 m
2016 Stash In: 15 m

Shorts for the man

Every now and then I plan to make a garment for Mark and seeing I had already made him two Strathcona Henely t-shirts and had purchased the Jutland Pants from Thread Theory, I thought a new pair of shorts was in order.

Mark does own a pair of red shorts so I didn’t feel that purchasing this burnt orange would be too much except my sewing buddies keep telling me it is my colour.

I then had some fun finding some manly cotton fabric for the pocket bags, waistband lining and bias binding.

My madness is based on the fact that Mark has a 30″ waist and last year I found it extremely difficult to find pants/trousers in this size and as he prefers not to wear a belt it looks like I could have a new job.

So I cut out a size 30″ and then couldn’t make up my mind if I was going to do patch pockets or welt pockets.

Welt pockets won, but it has been a long time since I have done these and I’m glad his RTW shorts have the bar tacks at the end of the pockets as this has helped cover my overcutting.

Even though I wasn’t completely happy with the welt pockets I decided to still make these as I wasn’t sure that the pattern 30″ waist would be equal to Mark’s real waist.

All seams are flat felled and I have used bias strips for around the edge of the fly.

Again my sewing machine didn’t like the buttonhole so I have again used the tutorial I used for my Jeans.

I found this button in my button jar and think it works perfectly for these shorts.

Mark found the waist to be very comfortable but did comment that these are a slim fit in the legs.  So next time I will add a some extra width in the front leg and see how that goes.

This is at the end of the day.

Now the fabric for these shorts were counted in the 2015 totals, but I attended the Sydney Spoolettes Fabric Destash event last Sunday and donated the green/black mesh knit that you can see at the top left hand of the picture below.  This was purchased during our trip to the USA back in 2011 and now I can only see the black in it so I am very happy it has found a new home.

******************
2016 Stash Out: 2.9 m
2016 Stash In: 15 m

What happens when you travel

you have parcels waiting for your arrival at your accommodation!

Our first stop was at Fife, in Washington State which was 10 minutes from the Sewing & Stitchery Expo.

When we checked in the front desk has 3 parcels for me which I had ordered before leaving home and knew I would not be able to easily source them myself during my 3day stay in the USA.

Parcel No. 1
You know about the purchase of my Juki M0-1000, well I also learnt that like the Bernina oerlocker it has a number of specialty feet available.  I can purchase them here in Australia, however the cost is pretty high so for the cost of say 3 feet here, I have

but wait,

There are actually 8 feet,

  • Blind Stitch Presser Foot Part No. 40138091: (for Right Needle) for making blind hems.
  • Elasticator Elastic Metering Presser Foot Part No. 40138095: To attach elastic tape to stretch fabrics
  • Cording Presser Foot Part No. 40138099: For attaching nylon string or wire on edge of fabrics.
  • Piping Presser Foot Part No. 40138103: For sewing piping.
  • Beading Presser Foot Part No. 40138106: For attaching pearls and beading with overlock stitching,
  • Gathering Presser Foot Part No. 40138121: For gathering and sewing with differential feed
  • Universal Blind Stitch Presser Foot: For making right/left needle blind hems and flatlock.
  • Curved Beading Presser Foot: For attaching pearls, sequins and beading with overlock stitching
  • Now I need to do so some serious playing.

    Parcel No. 2
    This next parcel might seem a bit odd, but one of my Christmas presents was the Dk-93 Manual Snap Press which I just had to have after reading about it on Lena’s blog.

    So this parcel from Minkus Margo (at Etsy seller) was 2 sets of dies – a 9.5mm nipple rivet die and 9mm cap rivet die. This is the actual size of the rivets.

    Parcel No. 3
    Two pieces of 1oz HpyerD Diamond Ripstop in Moroccan Blue and Burnt Orange.

    The ripstop I purchased for my Minoru is not water proof and after reading about Morgan’s Denali Vest  over at Thread Theory I decided to place an order with Ripstop by the Roll and purchased enough of the blue for another Minoru and the burnt orange for a vest.

    Now I have them home, they are very light so my plans may change.

    I also dragged Mark along to Jo-Ann’s to have a look around and this is what followed me home

    Not my normal fabric, but a pair of Carolyn Pajamas will make me smile every time I wear them.

    Then we headed to visit family and friends in Canada, so two more Canadian suppliers packages were waiting for me.

    Parcel No. 4
    I have dabbled in bra making with a Watson and really want to make my own bras for various reasons.  I already have the three  current Beverly Johnson’s Bra Making Classes on Craftsy and had heard that her manuals were very good.

    Parcel No. 5
    I have made Mark two versions of the Strathcona Henley t-shirt by Thread Theory and Morgan had talked about this luscious Canadian-made 100% cotton interlock fabric so I thought I would purchase a kit to see what Mark’s thinks of it.

    Of course since I have returned home there were a few more packages I could have had organised but there will be a next time I’m certain.

    ******************
    2016 Stash Out: 0 m
    2016 Stash In: 15 m