Presenting SWAP Item No. 7

Shorts!

I live in shorts in the summer around the house and dog walking and the shorts I do have need replacing but with my sway back I do not find this easy to do with RTW.

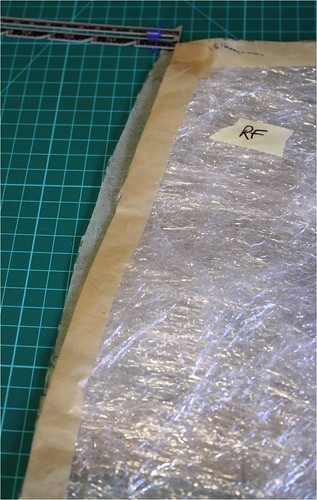
At Christmas my DDS wanted to give me a gift of the Sure Fit pants pattern,but first she needed to take my measurements. So in January I received a pants pattern and a pair of pants (excluding the waistband) made up in this very loud fabric.

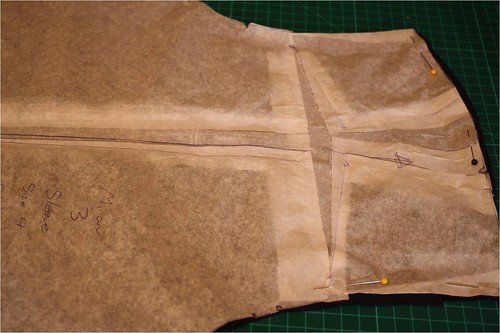
At the Angie fitting weekend where I sorted out the Minoru Jacket, Angie also tweaked this pants pattern.

  • reduced the waist height by 2.5cm (1″).
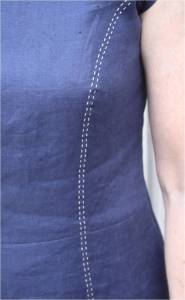
  •  centre back gaposis (you can see the excess above) 1.5cm (6/8″) back to nothing 9cm (3 1/2″) below. 

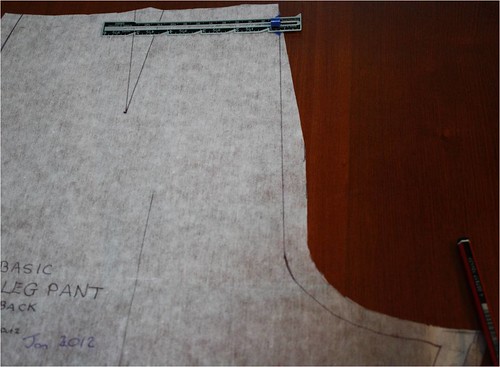
  • added 1cm to the back crotch length. 

  •  and dropped the back crotch curve by 5mm.
  • added extra width to the centre front.

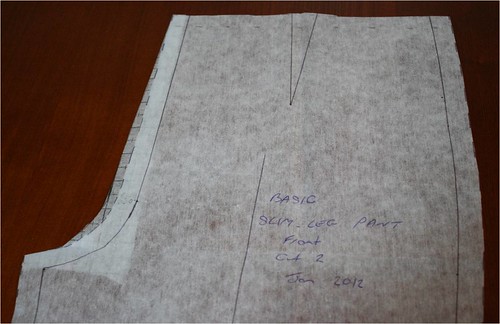
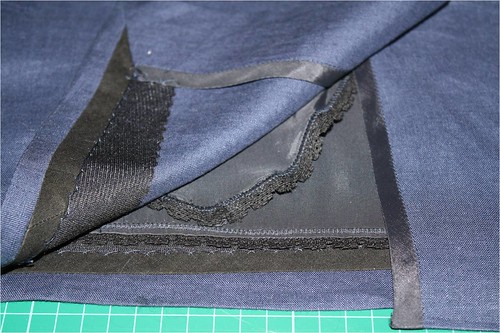
    I then traced off a new pattern (fixing that centre back seam line) for some shorts and proceeded to cut out the navy twill that I had with me for a wearable toile of the pattern.  The fly front was sewn and all the other seams were basted together for a quick review by Angie, where we took another scoop out of the back crotch curve by 0.5cm (1/4″).

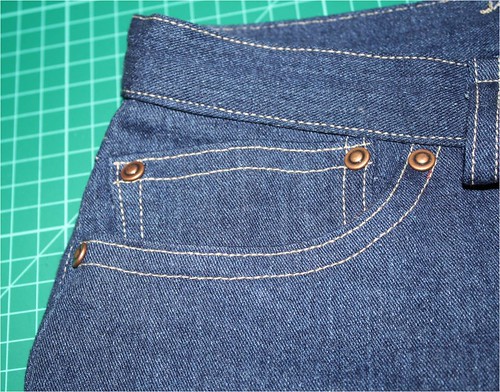
    When I got home I dug through my patterns to find one that had pockets (essential for dog walking) that I could use and found KS3614 fit the bill.

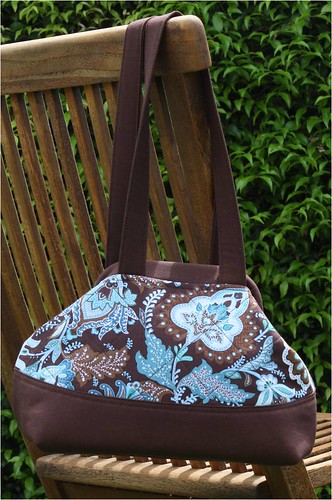
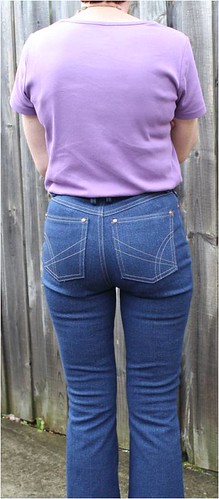
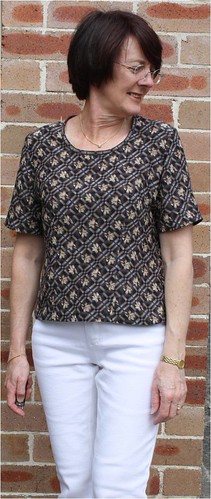
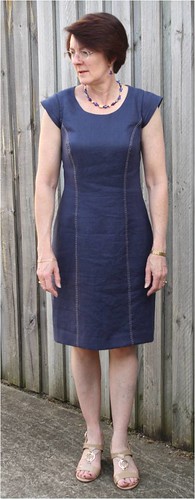
    So after all that, here they are:

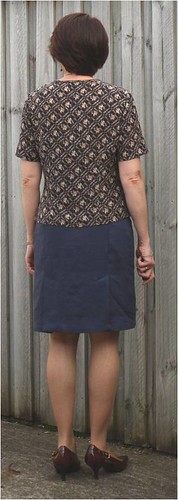
    Not sure about the front wrinkles, it looks like I have more than the colourful toile, but I do know I was a bit slapdash with the pockets and associated seams.

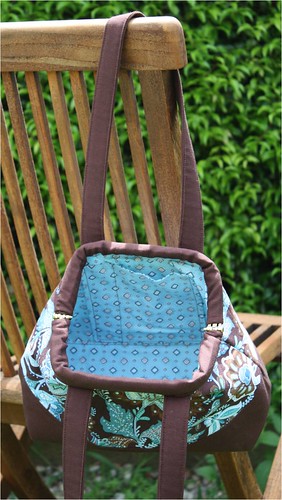
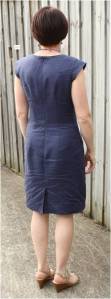
    The back looks better, only has a slight break and wondering if I need to do the flat seat adjustment?

    Even with those I am very happy with this version and will definitely make some more, maybe next time add cargo pockets so I don’t mess with the side/waist seams.

    Sewing, is this counted!

    Yesterday at the Rhodes Fashion Sewers ASG Group we had a workshop by the talented Monica Poole, the creator of  Moonshine Design, where there are patterns for bags, quilts and fashion.

    We all stared worked with the one pattern, The Spice of Life pattern and the 12 bags were all very different, traditional quilted cotton, faux fur, and Gail’s woven upholstery carpet bag which is very impressive.

    The main fabric and lining is a Vera Bradley quilting cotton that I bought off Etsy a while back and the brown is duck cloth that Alison had left over from her daughter’s laptop bag, friends are wonderful.

    The batting suggested for this bag is Matilda’s Own Bag Batting which a lot of the girls found very hard to find.  I ordered mine from Under The Mulberry Tree and it arrived very promptly and well packed.

    I also needed some Template plastic which another friend suggested I purchase the very thin cutting boards that are readily available at the $2 shops, I got a pack of 3 for $3 and they are just a bit thicker than the template plastic but much more cost effective.

    The zip for the internal pocket was from my stash and Monica had the Ghee’s tubular bag frame available on the day for sale.

    I made the small bag, the dimensions are 20 x 30 cm (8 x 12″).

    For the workshop we had to have all the bits cut out ready to start at 10.00am.

    By 3.30pm most of us had completed bags.

    And here she is:

    I divided the pocket in two,for my iPhone and a pen.    

    I’m very pleased with my new bag, yes I know there is a tuck of fabric above the pocket from when I topstitched the top down, and that the zippered pocket is not quite as nice as I would like, but this is my first handbag and I’m thrilled with how it looks.

    One of the girls did ask me if it would go with anything in my wardrobe!!

    Minoru update

    I made a muslin of the Minoru a while ago and wasn’t happy with the way the sleeves hung.  This is my first raglan sleeve pattern that I have every worked with, so I really didn’t know where to start.

    Last weekend some of my sewing buddies and I spent some quality time with Angie Zimmerman at her studio in Ingleburn with all of us working on fitting patterns and the first thing I worked on was the Minoru jacket.

    It turns out that I need more length over the shoulder, so we:

    • Drew a line across the sleeve at the shoulder point and another one down the length of the sleeve.
    • Split the sleeve lengthwise from shoulder point to the seam line at the cuff.
    • From the centre line cut the shoulder line across to the seam line 
    • Added 1cm (5/8″) to the width at the shoulder line
    • Spread the shoulder line by 2.5cm (1″)
    • I also shortened the sleeve length by 5cm (2″) 
    • The extra amount at the top of the sleeve from these adjustments, we left some of it to be included in the gathers, but did fold back 1.5cm (5/8″) on each edge of the sleeve, you can see it at the top of the photo below.

    Here is the the top half of the sleeve pattern, hopefully you can work out what I have done.

    Now the adjusted Minoru.


    I am much happier now with the way the sleeves hang and the fabric is now cut out and I’m ready to start sewing.

    ********************************

    My apologies everyone, I forgot to say that my 6th Garment for the SWAP was the 2nd pair of Jalie Jeans.

    SWAP Item No. 6

    The navy jeans are finished.

    I finally found out how to do a buttonhole on my Janome 5200 without using the buttonhole foot, it was so easy.

    The next challenge was the rivets, but then Marg from Pattern Review posted about this Prym Tool and luckily one of my very good sewing buddies was in Europe and was able to find me a set, a very happy dance as this little bit of plastic makes putting the rivets in so easy. To make it even better I have found that the 624 rivets and burrs I purchased from M.Recht in Melbourne a few years ago.

    The only changes this time to the white jeans I posted here is the two items above.

    So here they are:

    Front

     
    Back view and pocket design

    Rivets and coin pocket

    Now to work on the Minoru jacket.

    Vogue 7937 navy linen skirt

    is finished.

    Even though I have made this skirt a number of times before, although not blogged about, I have been trying to get the skirt to sit at my waist with no luck, it keeps sitting on my hips which isn’t what I wanted.

    Saran Wrap to my rescue!  Even though I have Isabel (my body double) my hip shape has been elusive when fitting my skirts. So I placed the Right Front lower half of my Saran Wrap on my pattern and look at the difference, no wonder my skirts kept sliding down to my hips.

    I pinned this amount out for this skirt to make sure I hadn’t gone too far, and it worked, my skirt sat on my waist all day long, so my pattern will be adjusted permanently by this amount.

    Here is the finished skirt:

    Front view

    See the Back Vent
    Back view

    A few extra details for this skirt:

    • Topstitched both sides of the front and back panels with Gutterman 310 Topstitch thread,
    • Finished the back vents with Hong Kong finishes.
    • Added black lace to the lining.
    • Added 15mm bias tape to the hem edge (now the skirt is on my waist I need to add some length to the pattern).
    • Fused a 4cm wide strip of Textureweft (pinked along the top edge) along the hem fold line to give the hem some body and a great base for doing Herringbone stitch for the hem.

    This is my 5th garment for the SWAP and the 6th is giving me some challenges with the buttonhole, but soon …

    I’ve got a new cutting table

    and it all started with an A0 Self Healing Mat that I requested for Xmas.

    Once DH collected the mat, he informed me that he would make me a cutting table to go with it, something that we can dismantle like the rest of the room for when we have guests.

    The top of the table is made from  the same timber as my sewing table and we purchased the Vika Kay adjustable legs from Ikea.The table is attached to the slats on the bed with sliding blots that lock in place, and DH has even drilled a couple of more positions just in case I want to lower the table or even have the table top on a slant (not sure if I would, but you never know).

    The table has had quite a bit of use since it was installed, a pair of navy jeans and a navy linen skirt have been cut out and both items are very close to being revealed.

    See the large blue bag to the right, that is my scrap bag, I really need to find a way to use these bits or just bite the bullet and throw/give them away.  The brown bag is for fabric that has to be washed, it doesn’t go in the stash until it is washed.

    Now to do some hems!

    New Blouses and a change of plan.

    The blouses that I referred to in my last post about the SWAP, are now finished. I met up with my sewing buddies yesterday and they levelled the hem on the Navy/Gold/Brown blouse for me and I stitched and pressed it last night.

    Burnt Orange Blouse

    This is the burnt orange blouse and by the looks of it I need to lower all the darts however that is an easy fix for any future versions. I took off an additional 1.5 cm on the neckline for this version and now need to work out more jewellery to wear with this top.

    Navy/Gold/Brown Blouse

    This remnant of silk was purchased during our trip to Paris in 2009 and I have been working up the courage to cut into it. I really don’t know why it took me so long, it was lovely to sew with, just a nightmare to match the pattern 😦

    I used a bias strip of the silk to bind the neck edge and I’m very pleased at how this has turned out.

    Both blouses have an invisible zip in the left side seam.

    SWAP Plans

    So much for the Navy Jacket.  When I laid out the material I couldn’t fit both the jacket and skirt on the piece I had left. Even though I really wanted the jacket (and I spent hours trying to get it to fit) I realised that a skirt would get a lot more wear as I have another 2 tops in my wardrobe that are orphans at present. So Vogue 7937 Skirt View A has been cut out and I’m now searching my patterns for a vest pattern.

    Now back to sewing jeans.

    Sewing with a Plan

    I am once more attempting the SWAP Contest at Stitcher’s Guild and this year the SWAP focuses on fitting, and making tried-and-true patterns: testing and fitting paper patterns, muslins, and fashion garments that will help lower the overall sewing failure rates,  result in fabulous clothing to be proud of, and (hopefully) give every contestant a pattern or two that works every time it is used.

    You choose any seven garments from this list:

    Button Down Shirt w/Collar
    Blouse or shirt   (collar is optional)
    T-Shirt
    Vest
    Overshirt
    Dress
    Jeans
    Trousers
    Shorts or Capri Pants
    Skirt
    Jacket (jean jacket, windbreaker, hoodie, etc.)
    Coat  (suit or sport coat)
    Overcoat or Raincoat
    Bathing Suit Coverup

    From those seven, you can choose four to make twice for a total of 11 garments that will work together.   Those four may either be repeated garments from the same pattern, or one each from two different patterns.

    The contest runs from 26 December 2011 until 30 April 2012 and you can have 2 previously sewn garments amongst the total 11.

    Now I’m planning on using my last 2 garments as the pre-sewn items, so it looks like Navy will feature quite strongly in my SWAP.

    The garments I have chosen so far are:

    2 x Blouse or Shirt – Vogue 8572  (OOP)
    – Burnt Orange – completed 
    Navy/Gold/Brown – completed

    1 x Dress – Simplicity 2648 
    – Navy linen with pickstitching – completed

    2 x Jeans – Jalie 2908 
    – White Jeans completed
    – Navy Jeans completed.

    1 x Jacket – Vogue 7975 
    – Navy with some seam details added

    1 x Skirt – Vogue 7937
    – Navy linen, View A – completed

    1 x Raincoat – Minoru 1103 
    – Navy ripstop – pattern adjustments done and fabric cut out and nearly finished.

    1 x Shorts – Sure Fit Pants
    – Navy twill – completed

    1 x Vest – Jalie 3129
    – Navy linen – completed
       
    2 x Knit Tops 
    – Navy/Green striped using Kwik.Sew 3740 – completed
    Brown/Navy/Cream abstract print from Fabulous Fabrics using BWOF 02-2009-108

    The remaining 4 garments are still a question mark:

    • Do I make 2 knits tops, but
    • I really need shorts, which can be a test for the fit for pants 🙂 1 pair now in the plan
    • I will need a navy skirt to go with the jacket (fingers crossed I have enough fabric) Now in the plan
    • I really want to fit the Connie Crawford B5300 shirt, but not sure if I have a shirt fabric that will go with the Navy as I’m tyring to work from my stash.

    Now I need to make some final decisions and that includes a name for my SWAP.

    As I don’t like having a pictureless post, I thought I would share with you one of Roscoe’s favourite things to do:

    It takes days to get the sand out of his fur 🙂

    22/1/2012 – Plan edited – Jacket out and Skirt in.
    17/4/2012 – Plan edited – Shorts, Vest and 2 knits tops are in.

    Perfect for a summer’s day

    Happy New Year, everyone.

    I was surprised the other month when sorting out my stash, that I have quite a collection of blues.  They are in my colours and three pieces have materialised in my wardrobe – the cargo pants and then the navy pants and top during last year.

    I then found some navy linen in my stash, Simplicity 2648 and inspiration from DrienPA on Pattern Review, I have completed the 2nd version of this dress.

    I remembered seeing an article in Australian Stitches (Vol 19, Issue 7) that Alison, The Sewing Lady had written where she had constructed a Marfy jacket and then hand stitched around the jacket and pockets that looked like pickstitch.  Luckily for me Alison had adjusted this pattern for me, so I was able to contact her to find out a bit more detail on how to do the pickstitch on my dress.

    The dress was cut out and the front (princess seams and waist) and back (darts and waist) pieces where sewn together (but not at the shoulders or side seams).   Then I,

    • Set up my Janome sewing machine with the G foot and a 4.0 twin needle.
    • Threaded the machine with a cream Gutterman thread, reduced the tension to 1.5 and the stitch length to 3.5 and needle position at 2.4.
    • Stitched from the armhole, lining the G foot guide along the princess seam and stitched all the way down both front princess seams, making sure that the stitches crossed the waist seam at the same point.  This gave me a good reference point for the pickstitch.
    • Then on Boxing Day, I threaded up a Size 24 Tapestry needle with Gutterman Topstitch thread 722 and proceeded to pickstitch using every 2nd stitch as my guide to bring the needle back up.
    • Carefully removed the Gutterman thread and gave the seams a good press.


    The rest of the dress went together pretty quickly.

    The dress is lined and has a lace hem and the back vent has a hong-kong finish to the edge.

    Then I found this necklace that needed to be reworked.

     
    After sitting all day

    Here is a close up of the pickstitch after the guide threads have been removed.


    I can see this dress will get a lot of wear.


    Where did 2011 go?

    They say time flies when you’re having fun, and I’ve obviously had a lot of fun this year as 2011 has absolutely rocketed by.

    I know I sew a lot, but I do feel that I don’t complete a lot of items, therefore I find it interesting to see what I have achieved at the end of each year, and it was:

    7 x Tops
    2 x Pants
    2 x Skirts
    2 x UFO’s
    1 x Cardigan
    1 x Jeans
    1 x Hand knitted garment
    5 x Jewellery pieces
    3 x Craft

    Patterns used:

    BWOF – 2
    Simplicity – 3
    Vogue – 2
    Jalie – 1
    Marfy – 1
    Kwik.Sew – 2
    Self Drafted – 2

    Favourite Garment

    Even though they have only just been finished, I have to say it is the Jalie Jeans. The fact that I have got such a great fit is the reason I sew and I’m so glad that I do.

    The other is Kwik.Sew 3740, this is such a great fitting pattern for me, even though I only made 2 tops this year from this pattern they have been worn constantly and I plan on making some short sleeve/no sleeve versions for summer with this pattern.

    Highlights

    • Attending the Sewing & Stitchery Expo in Puyallup, USA with my two sewing buddies Alison and Maria.
    • Spending a weekend with my Mum and Sister sewing at Bribie Island.
    • Another sewing weekend with my sewing buddies at North Ryde.
    • Organising the Pattern Review get together here in Sydney and meeting a group of wonderful ladies.

    2011 Sewing Goals – How did I go?

    • Complete 1 garment a month – I’m still working on this, with all the sewing days I have it is a mystery to me why this doesn’t happen.  However with a total of 24 pieces I must have had some very productive months 🙂
    • Complete at least one competition either at Stitchers Guild or Pattern Review – This just didn’t happen.

    2012 Sewing Goals

    • Complete 1 garment a month, I would really like to start/finish a garment a month.
    • Complete at least one competition either at Stitchers Guild or Pattern Review.
    • Play with the binders for my Coverstitch machine and get comfortable using them.

    And finally, a collage of the pieces I made in 2011.

    There are a couple more UFO’s to complete and hopefully I will be able to share them with you soon.

    Happy New Year and thank you for stopping by.